🤎 Silver Clay Membership — $9/month. Get access to most tutorials, course discounts, and maker community.
Everything you need to start
creating with silver clay

I put together this guide to explain what each item does, share affordable alternatives, and point you toward where I got mine. I’ve kept the list focused on the real necessities, with cheaper options wherever possible.
Some links are affiliate.
Want it as a handy PDF cheatsheet as well?
THE MUST HAVES
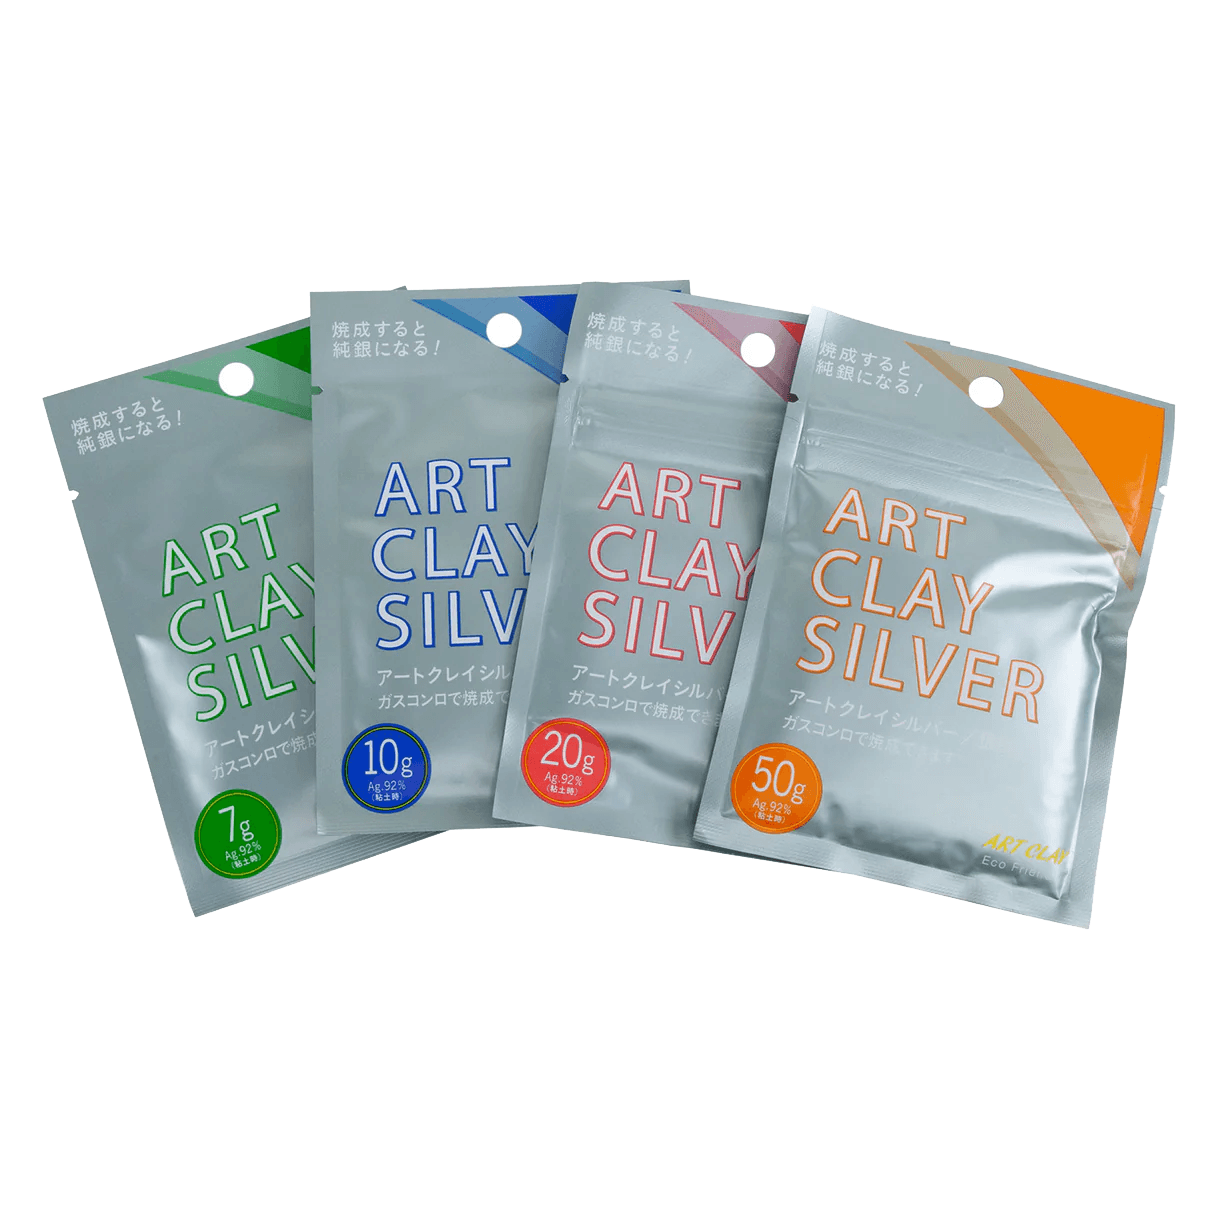
Silver Clay
The star of the show! If you are firing with a torch, make sure you select torch fireable clays (links below), these would be fine (999) silver clays. If you have a kiln, you can browse other silver clay types too, such as sterling or 950 silver clay! Different brands can have different shrinkage rates - choose the one that suits your needs!
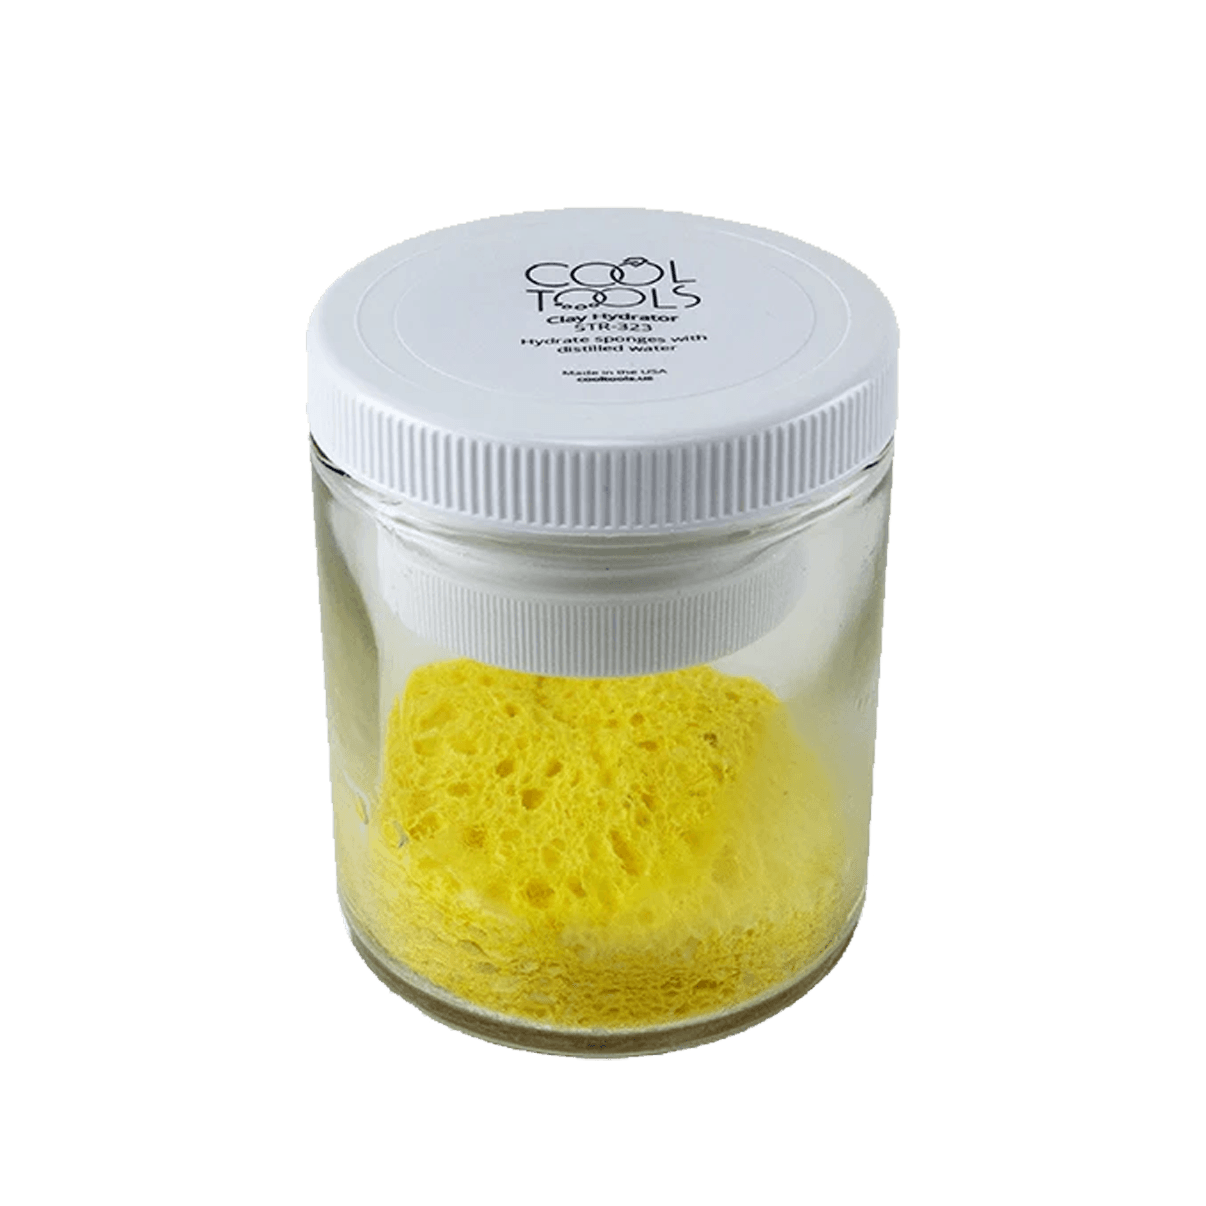
Clay Hydrator
This is a game changer for storing silver clay! If not stored well, it can dry completely. This little thing will keep it in good shape for ages. Wet the sponges, squeeze excess out, wrap your clay in some cling film and pop it in. Shop or try to make your own!
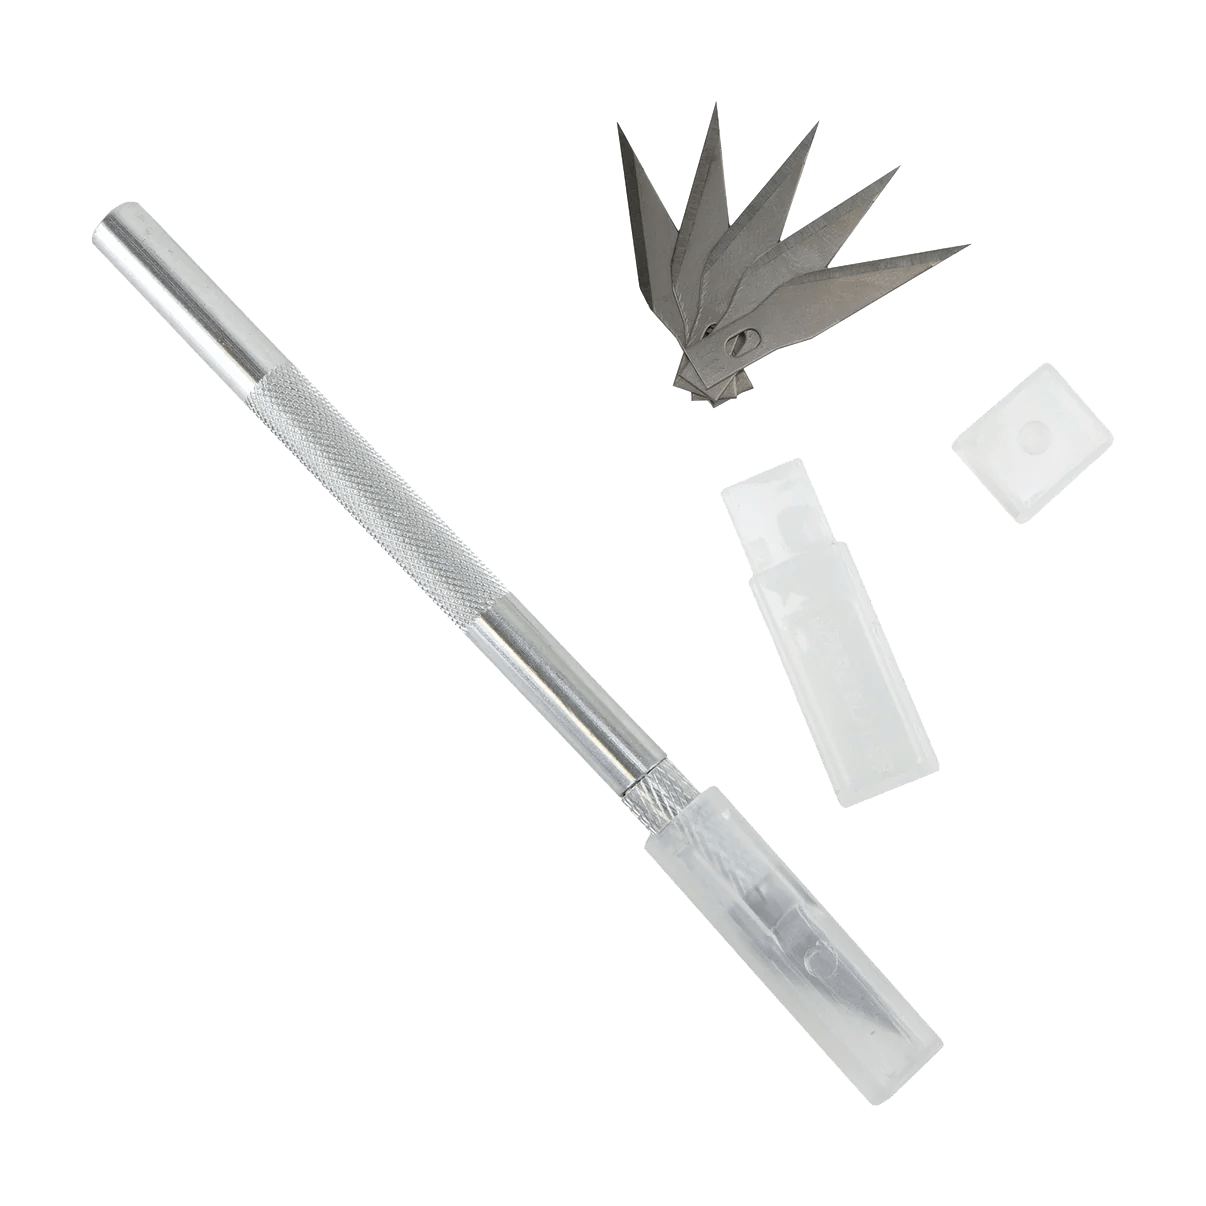
Carving Knife
To cut your silver clay into shapes. A regular snap off blade will work too, but those craft knifes are great for precision!
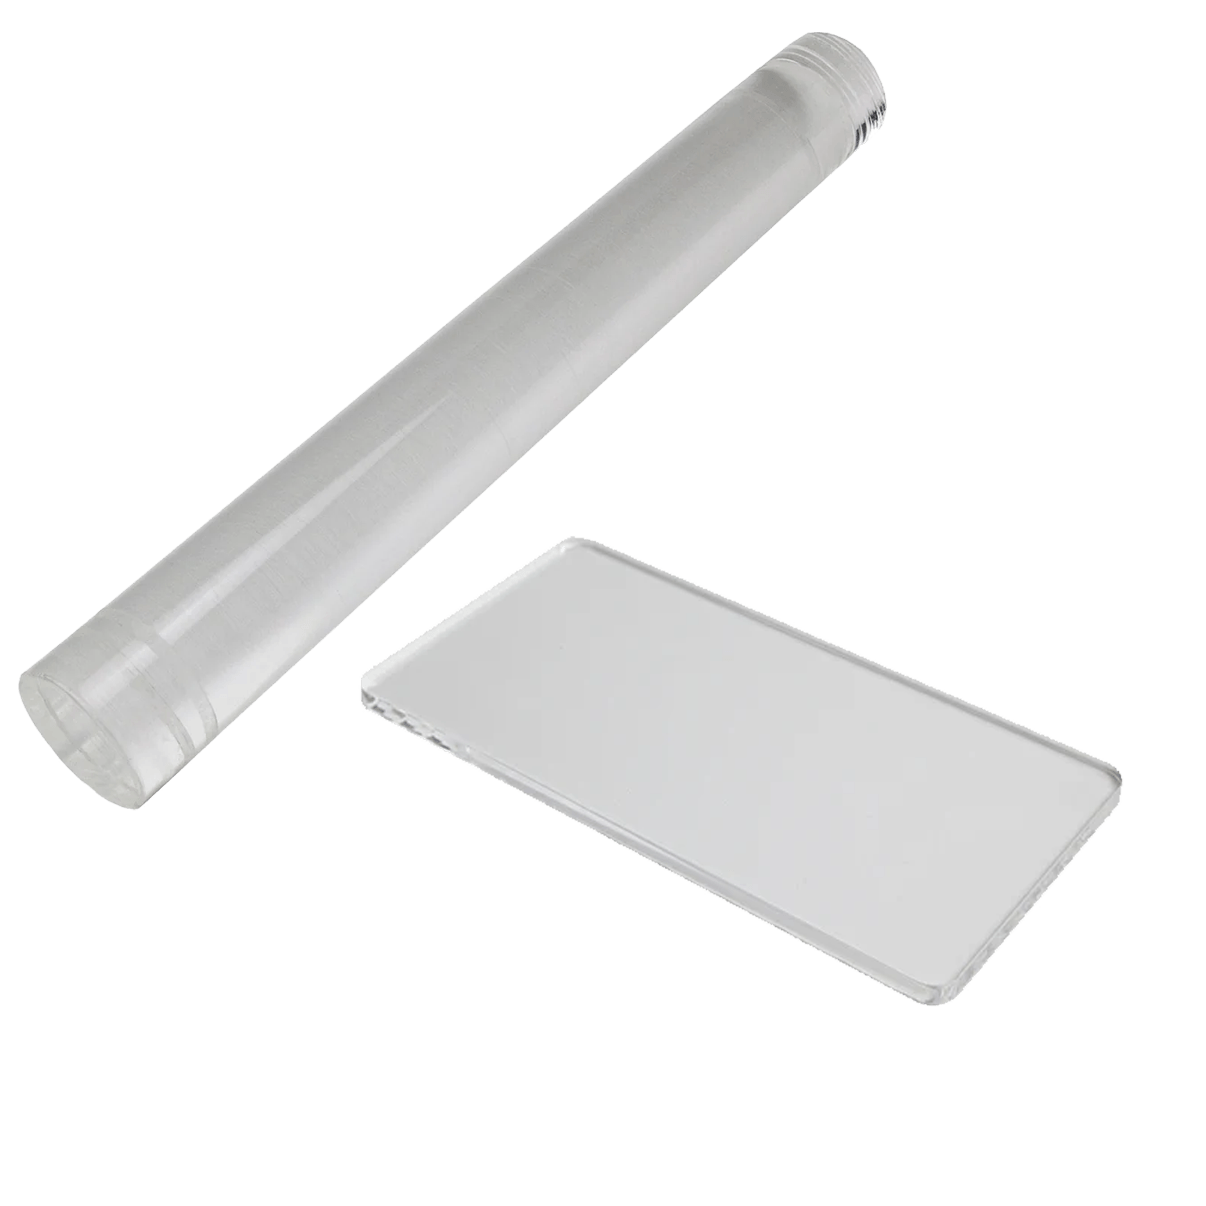
Rolling Tools
You will need these to roll out your clay and to make 'clay snakes'. These are the bases of your designs.
Sculpting Tools
They will help you shape and sculpt your clay! They come in different shapes and sizes, having a set it helpful for every occasion
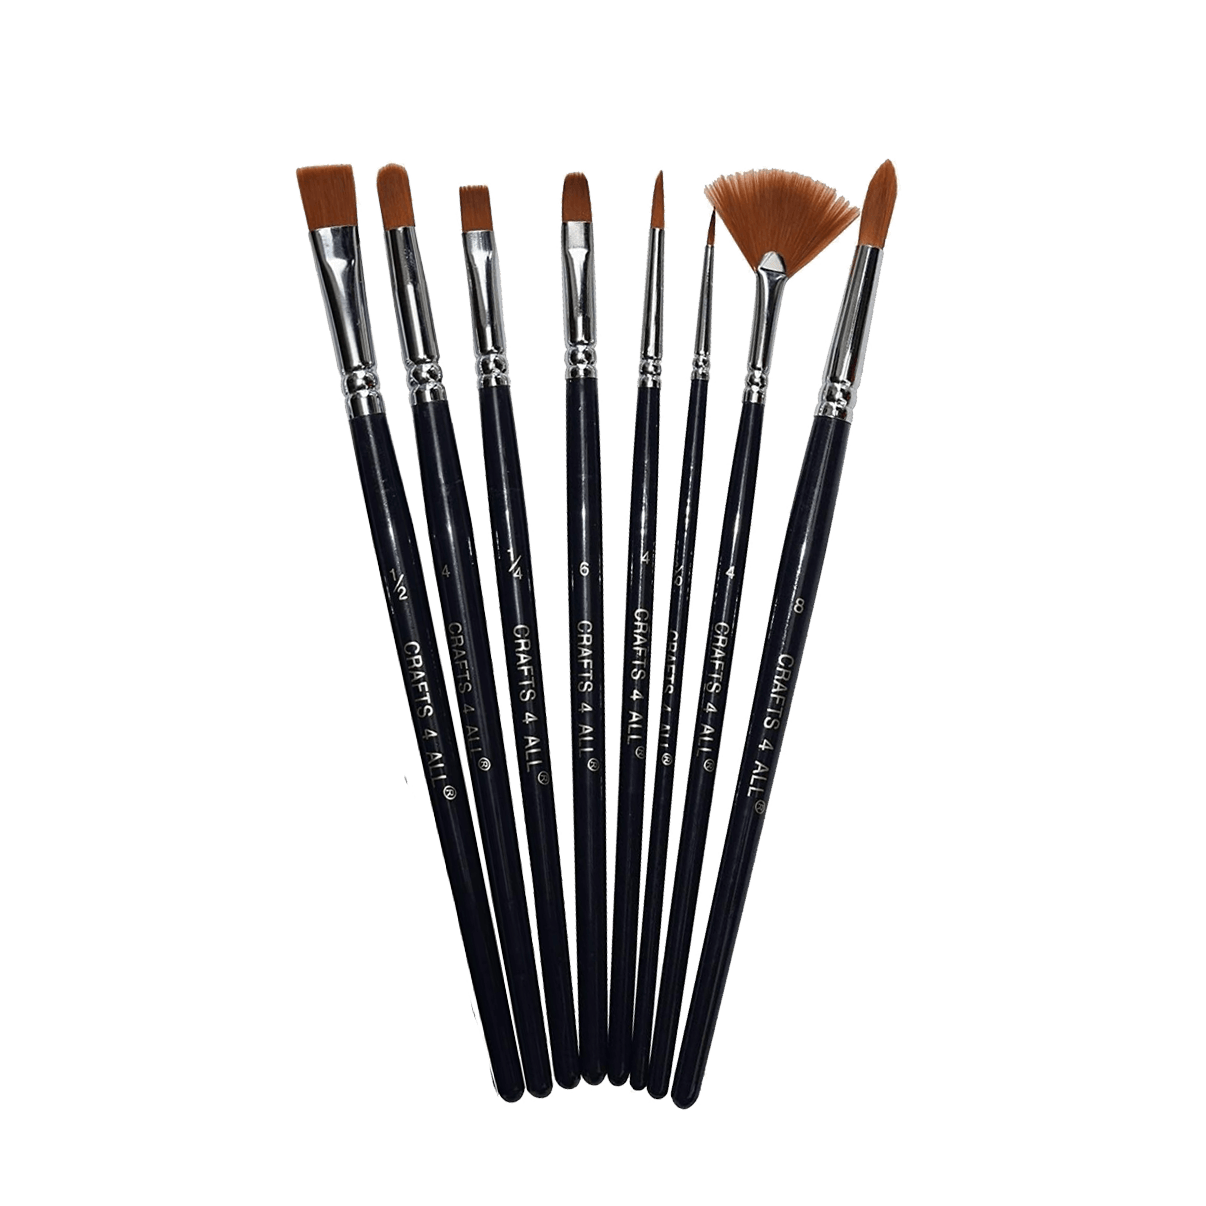
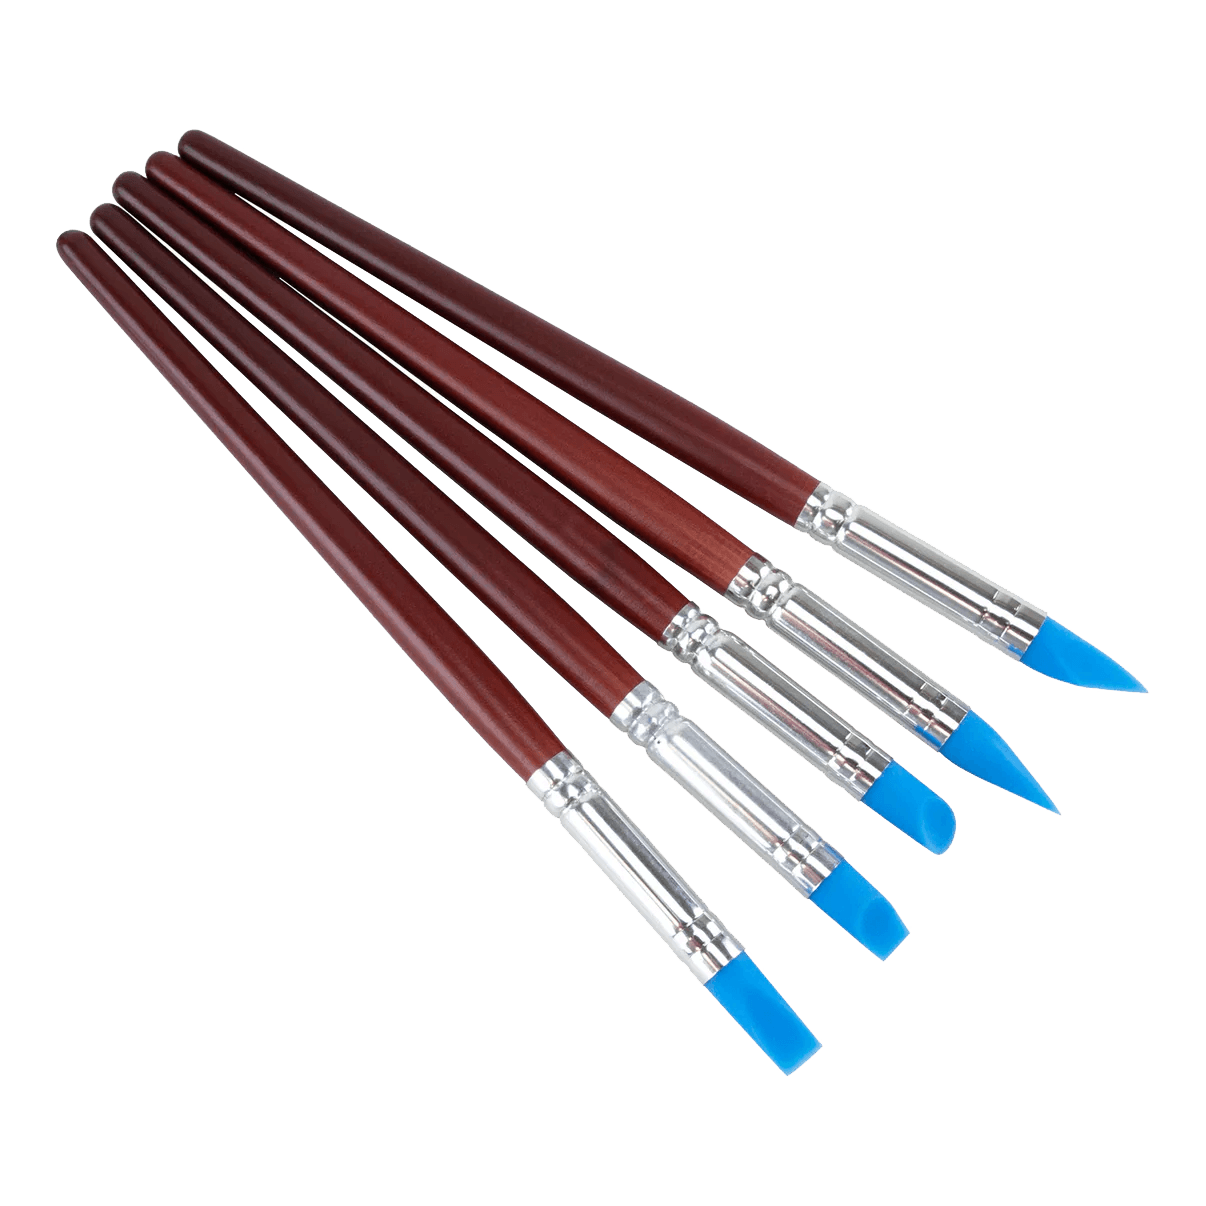
Couple of Brushes
A couple thin brushes will help you shape clay, lay clay paste to attach parts and brush water on it to prevent it drying too fast. Cheap ones will do!

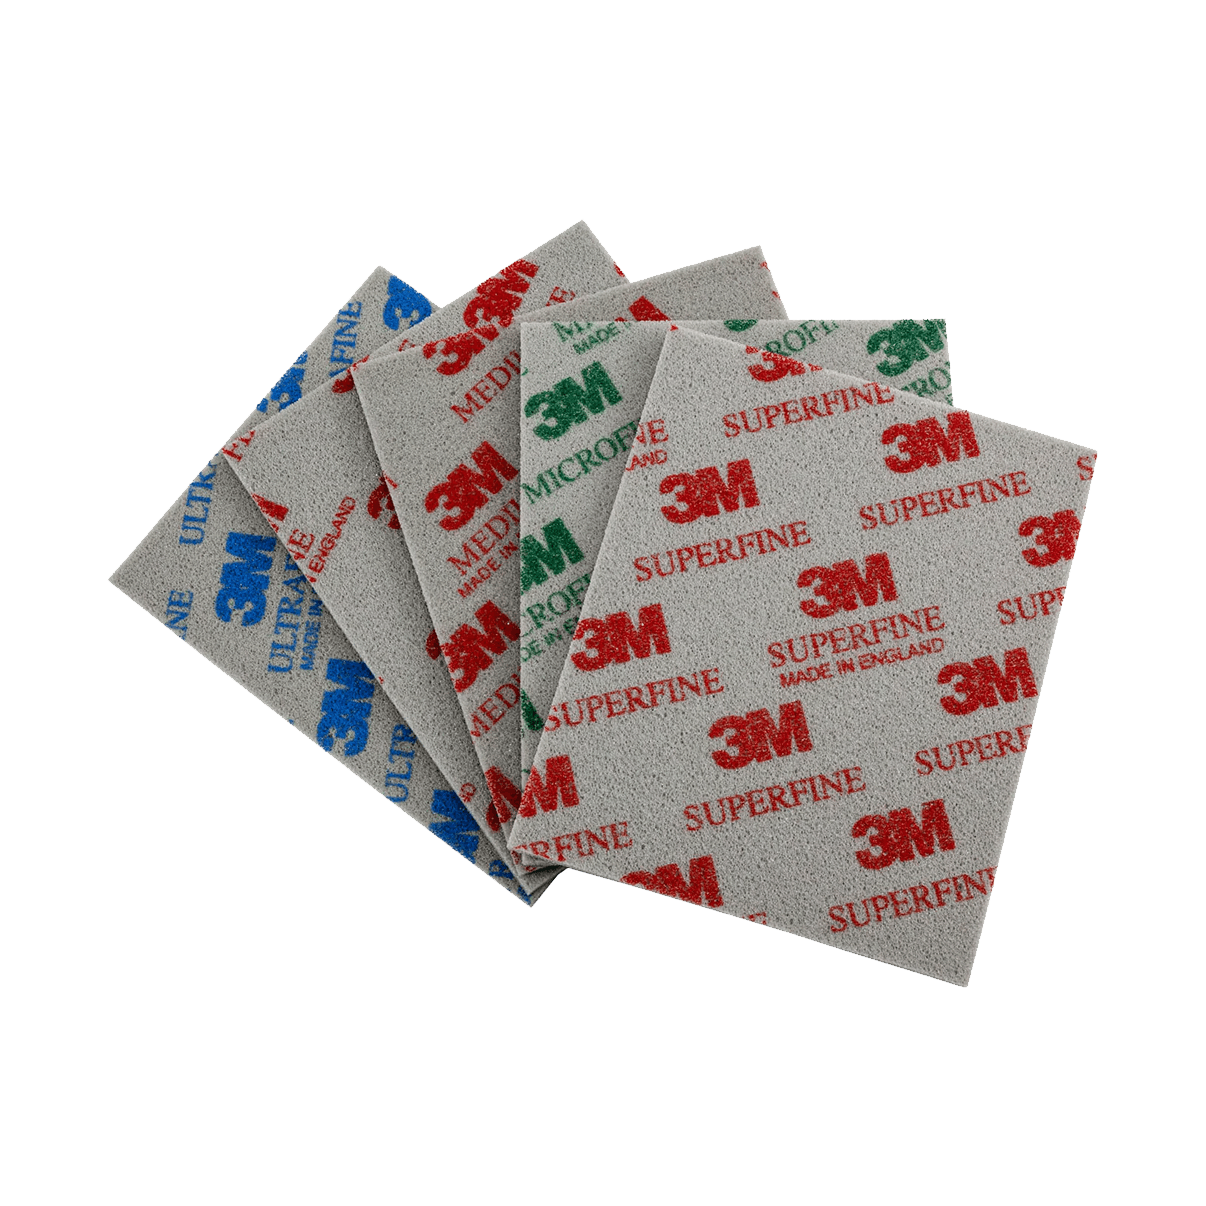
Sanding Paper
Use this when your silver clay piece is dry, before firing. Helps remove scratches and imperfections, shape your design with ease and pre-polish before firing so final creation is super shiny!
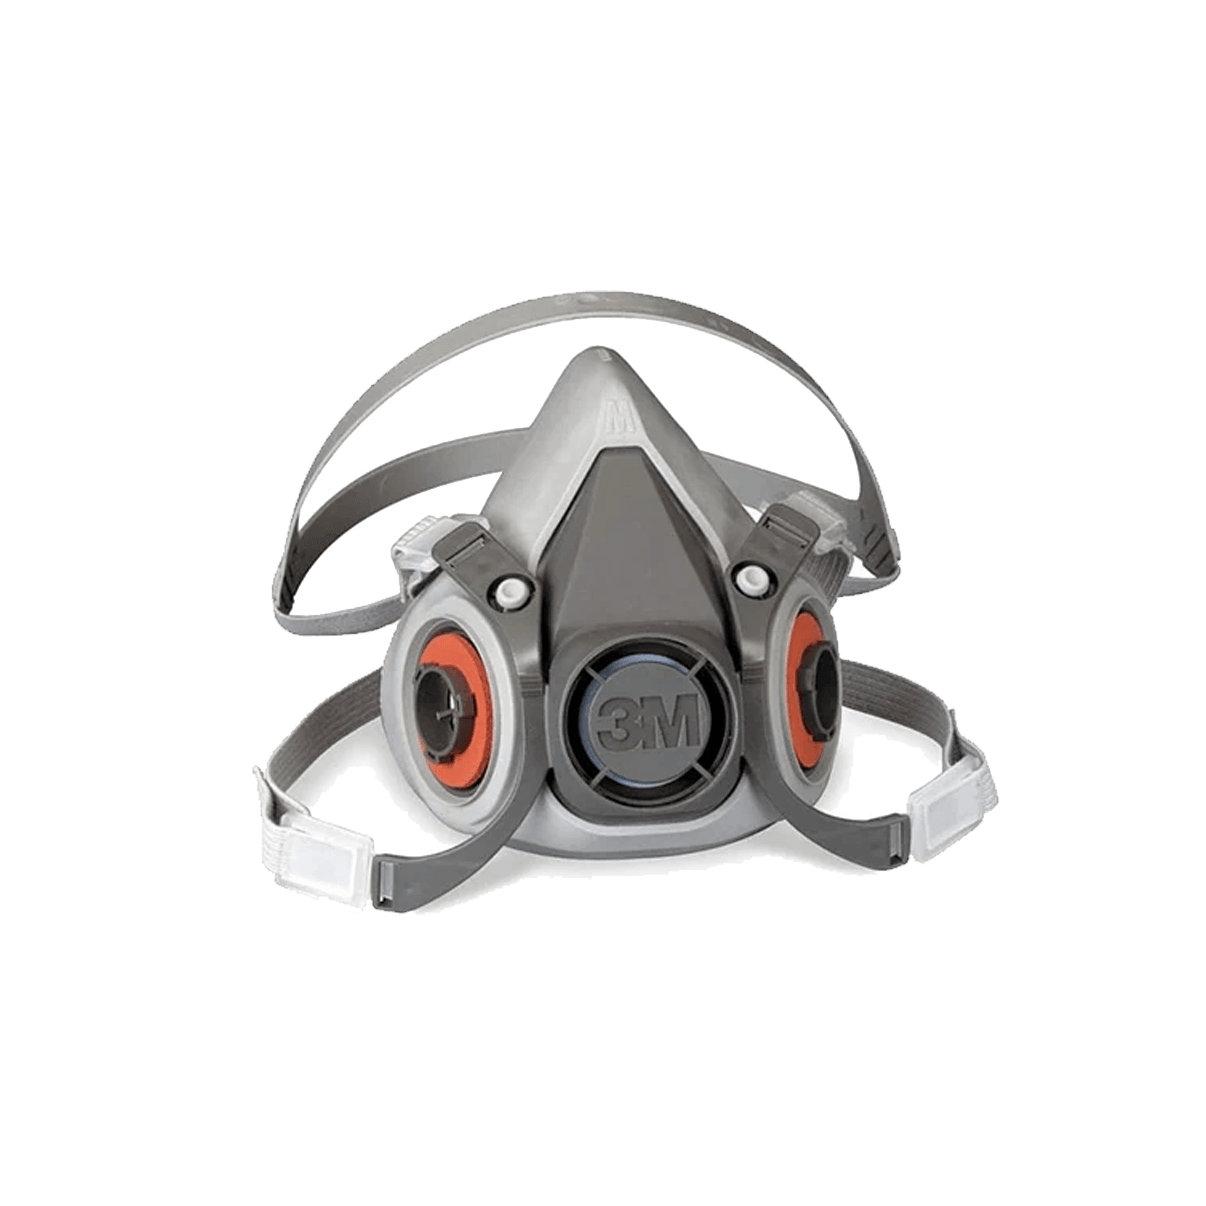
Respirator or Mask
Don't get scared! This is why you need it: when sanding dry clay (e.g. to smooth it out), there will be some dust, and like any dust, you don't want to breathe it in! A respirator is comfy and reusable. But at the very least, pls use a dust mask, but a respirator is better and more convenient!
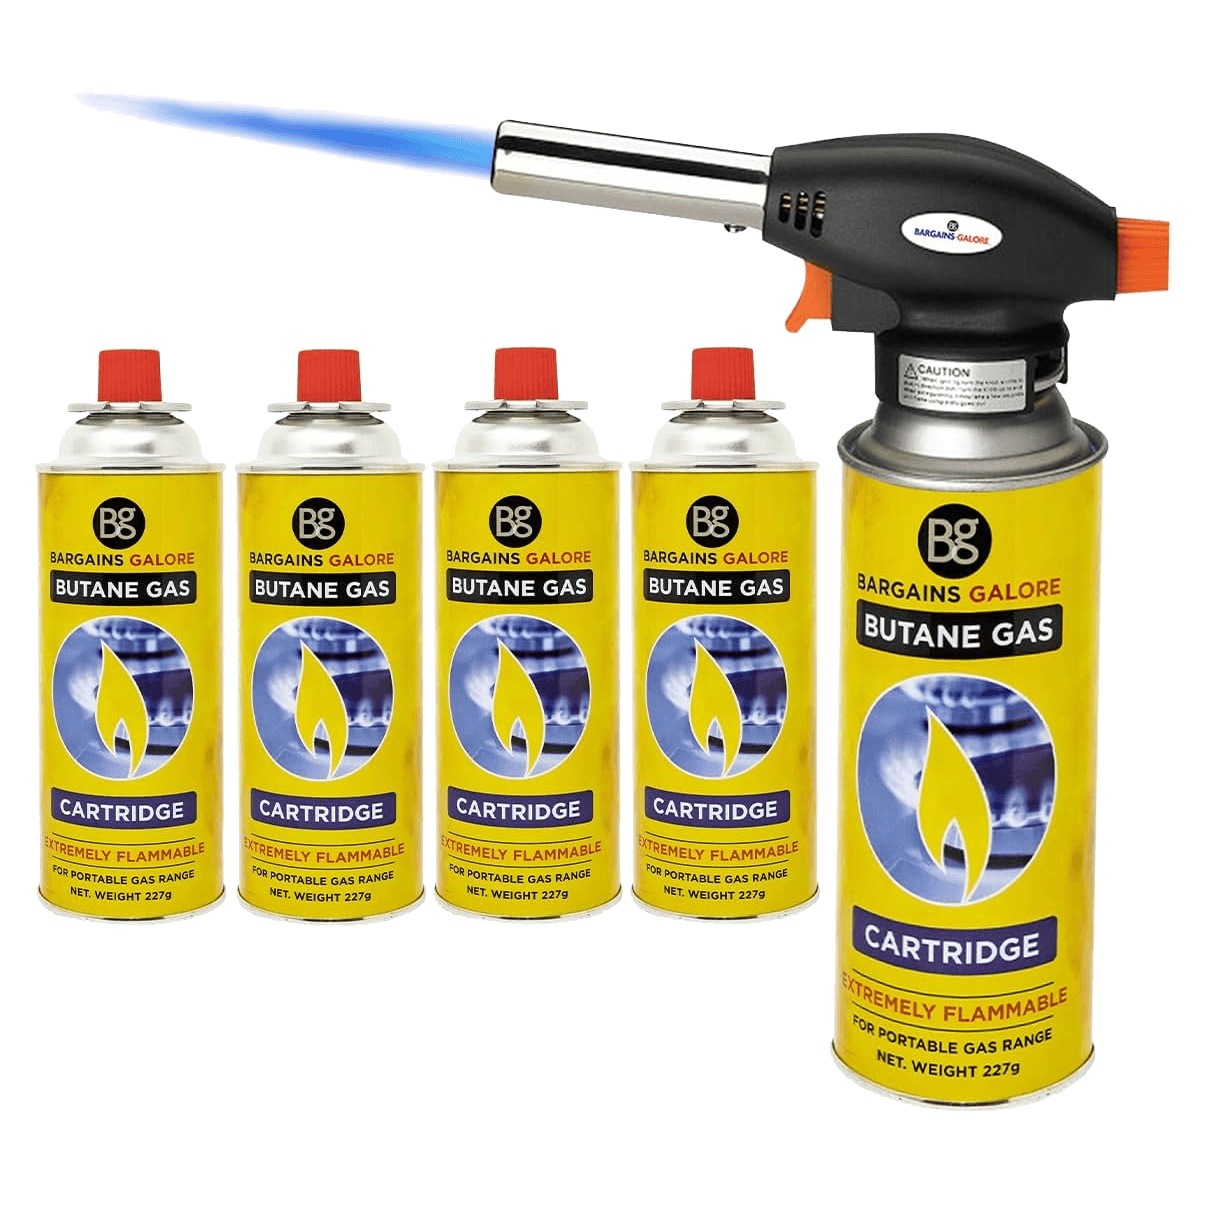
Torch
If using torch-fireable silver clay, you can use a torch to fire it. A regular butane torch from your local DIY or a hardware store will do the trick! Otherwise you can shop torch lighter below
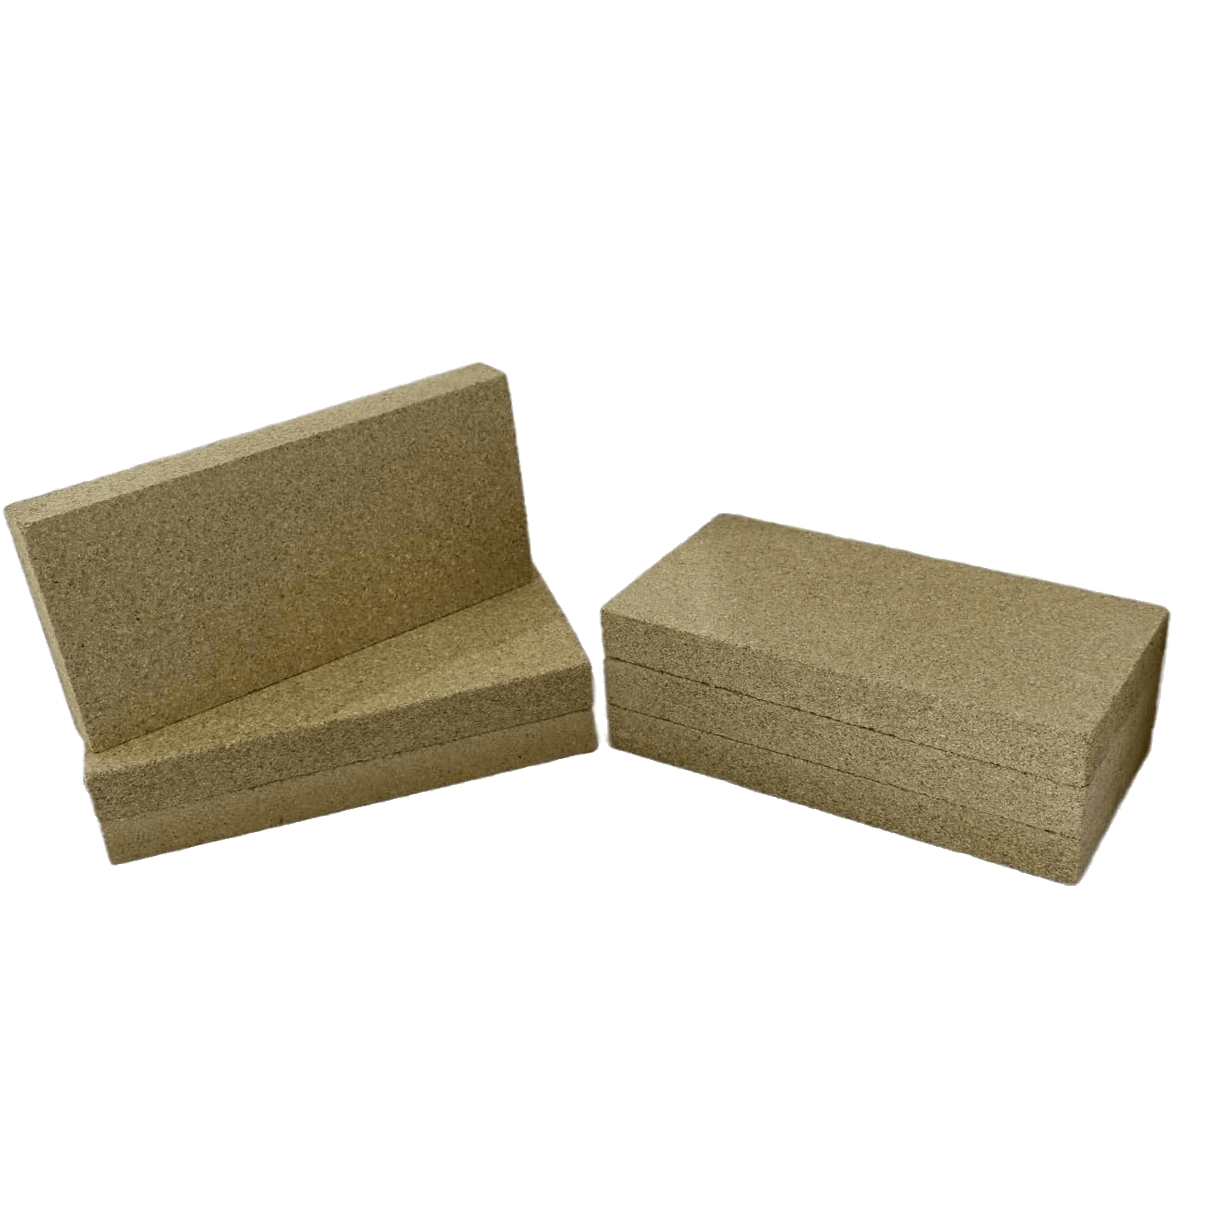
Firing Surface
Get whatever is easiest for you to find – a soldering block, fibre brick, or firebrick (like the ones used in pizza ovens). Suitable materials are: ceramic fiber block, vermiculite fibre brick, or soldering block. Sometimes it will say what temperature they are rated to withstand, 1200C/2000F is a safe bet! You can fire the clay piece directly on them. Make sure what’s underneath and around is not flammable. DO YOUR RESEARCH depending on your space for the safest way to do this. TEST FIRST with your torch for a minute just to make sure all is good!
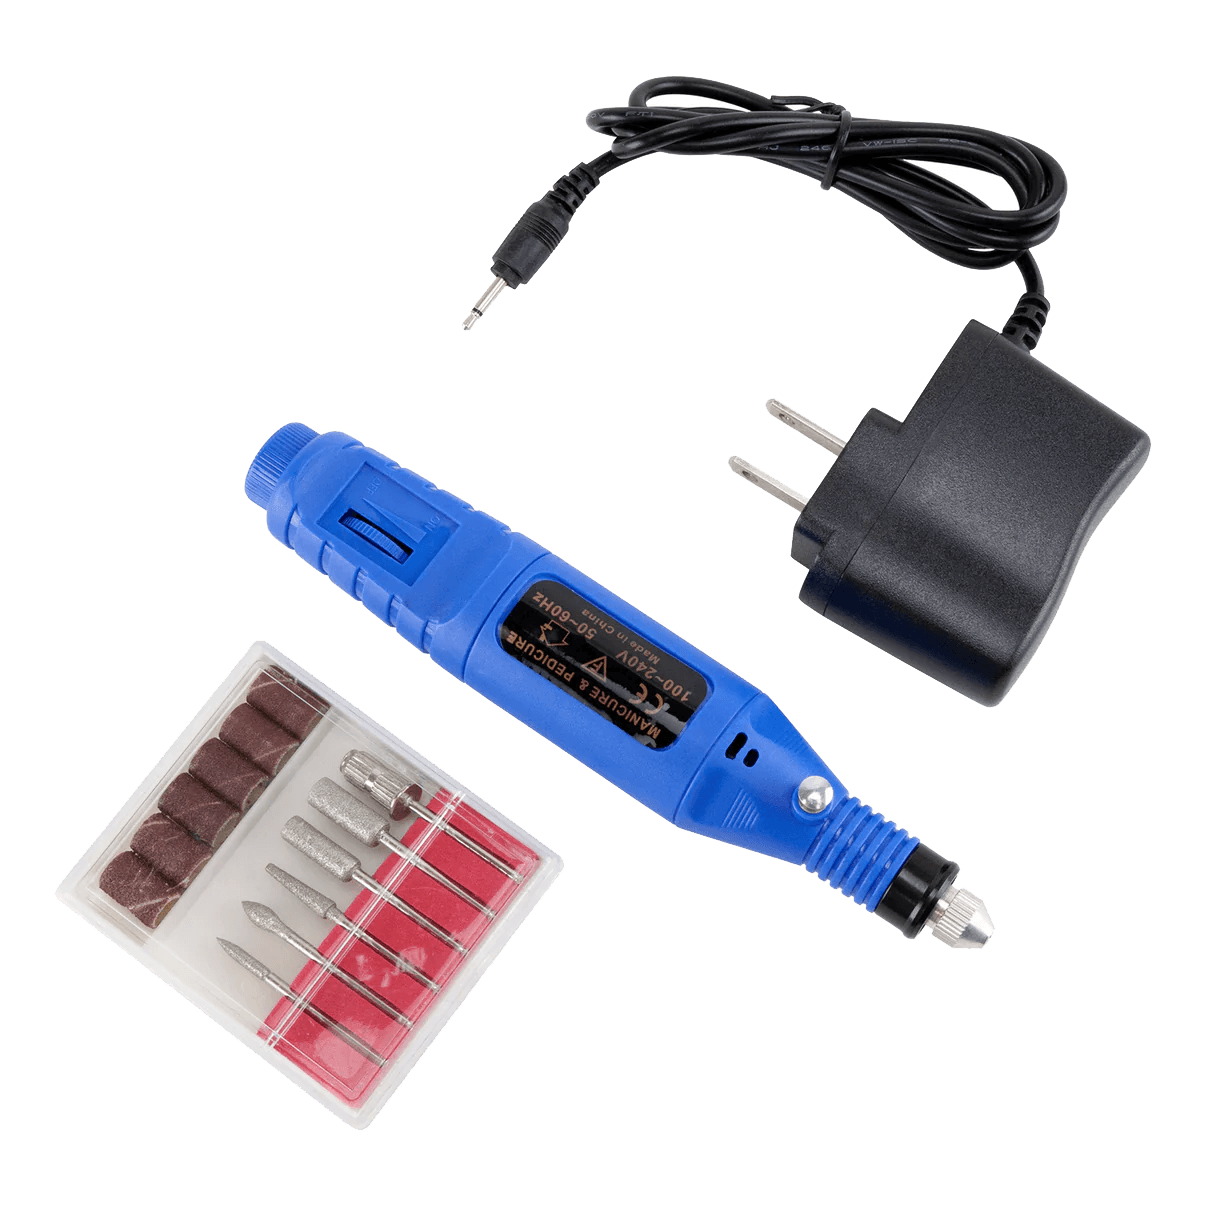
Polishing Tools
There are two ways to polish: polishing papers OR a rotary tool + radial disks. The rotary tool will get you a better polish and will be handy for drilling dry clay or even remodelling after firing when it becomes silver. Radial disks are great for polishing - they get into tiny details and do not need a polishing compound. You will need several grits - a coarse, medium, and fine. Use them in that order!
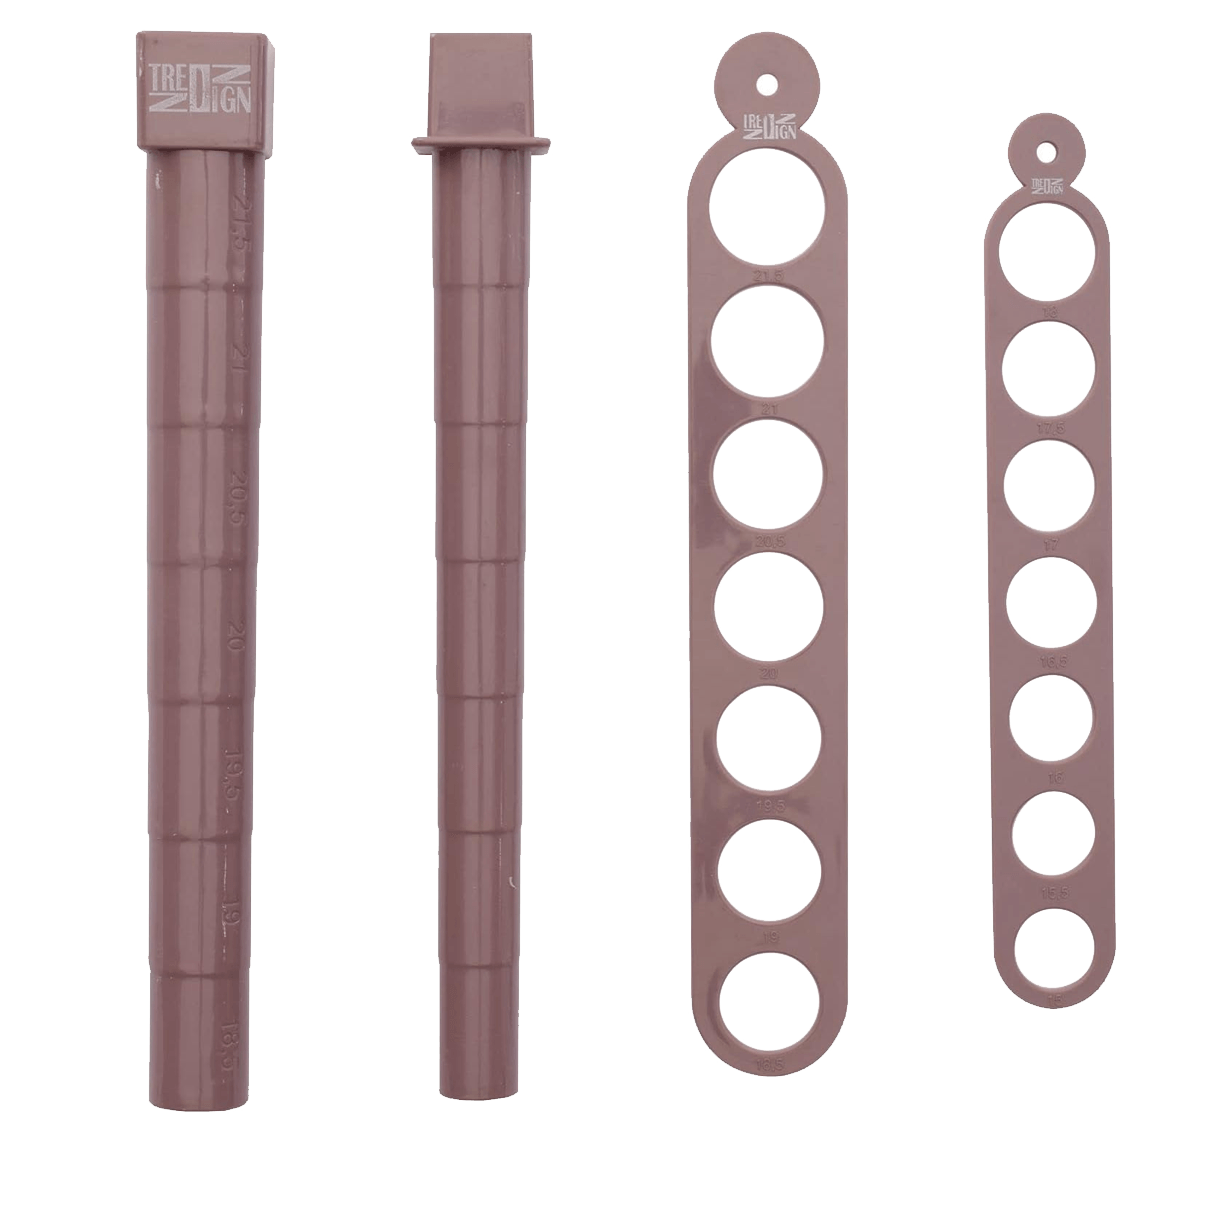
Ring Mandrel & Sizers
Only if you are planning to make rings! NOTE: clay shrinks by volume so make the ring 2 – 4 sizes bigger than desired (thin dainty designs will shrink less than chunky ones). Use a strip of baking/parchment paper secured with a small piece of tape. Wrap it around the desired size on the mandrel and place your clay on top of this base. This way you can take the ring off easily once it’s dry!
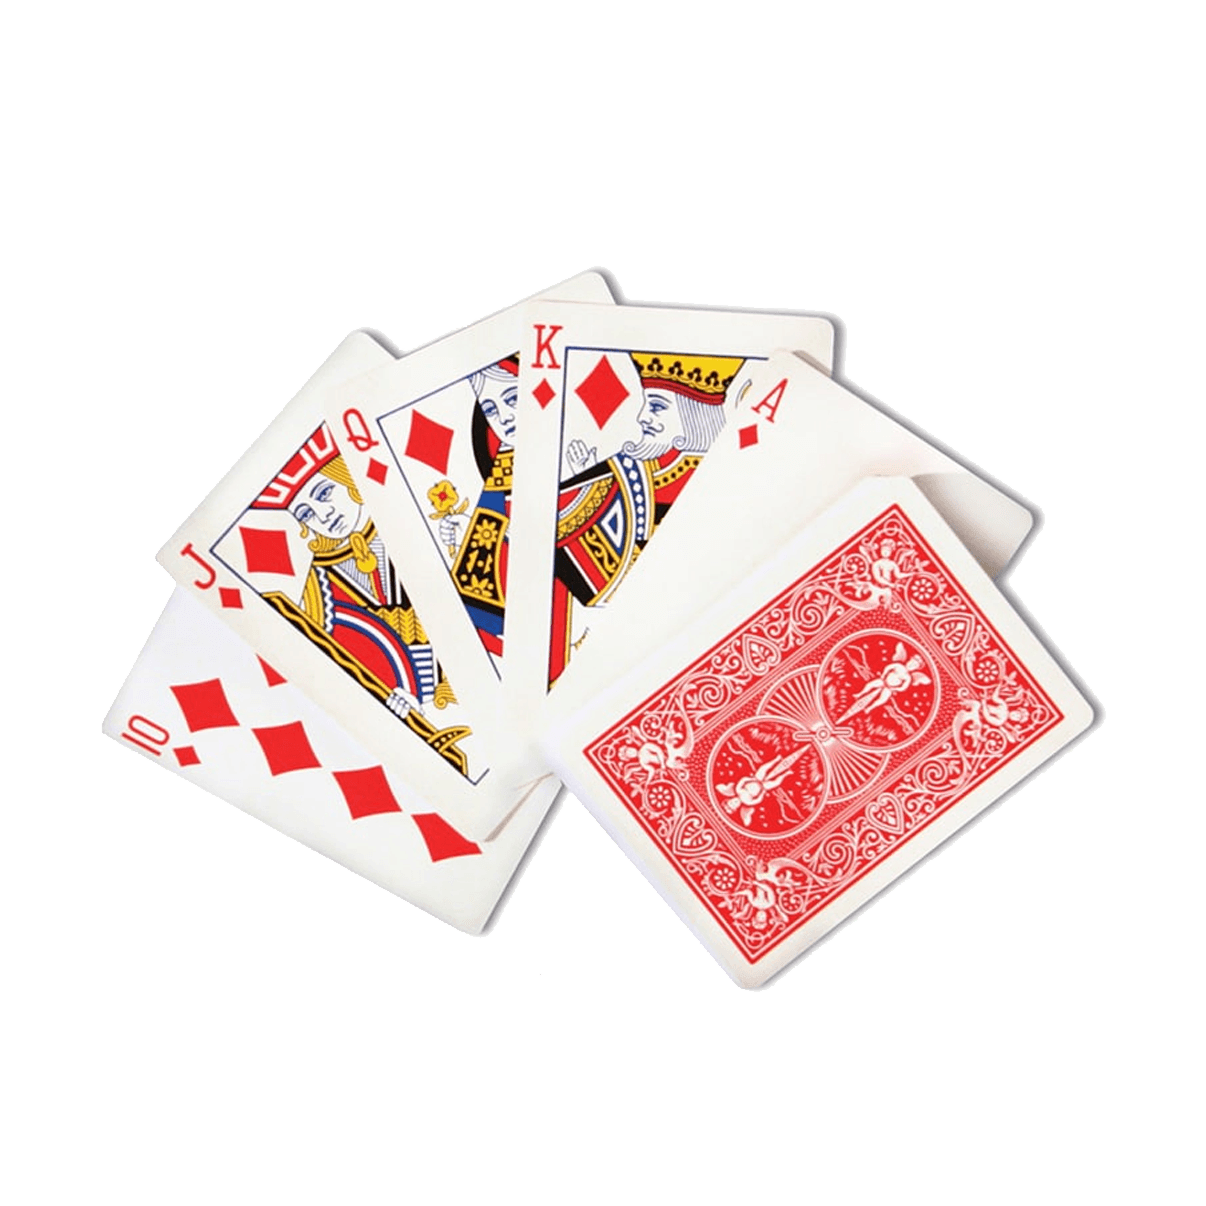
Playing Cards
Yep, those regular playing cards you have gathering dust in a drawer. Use them to control clay thickness when rolling it out. Just place equal stacks on either side of your clay and roll with a rolling pin. The cards will act as a stopper for your rolling pin, making sure the thickness is consistent and exact!

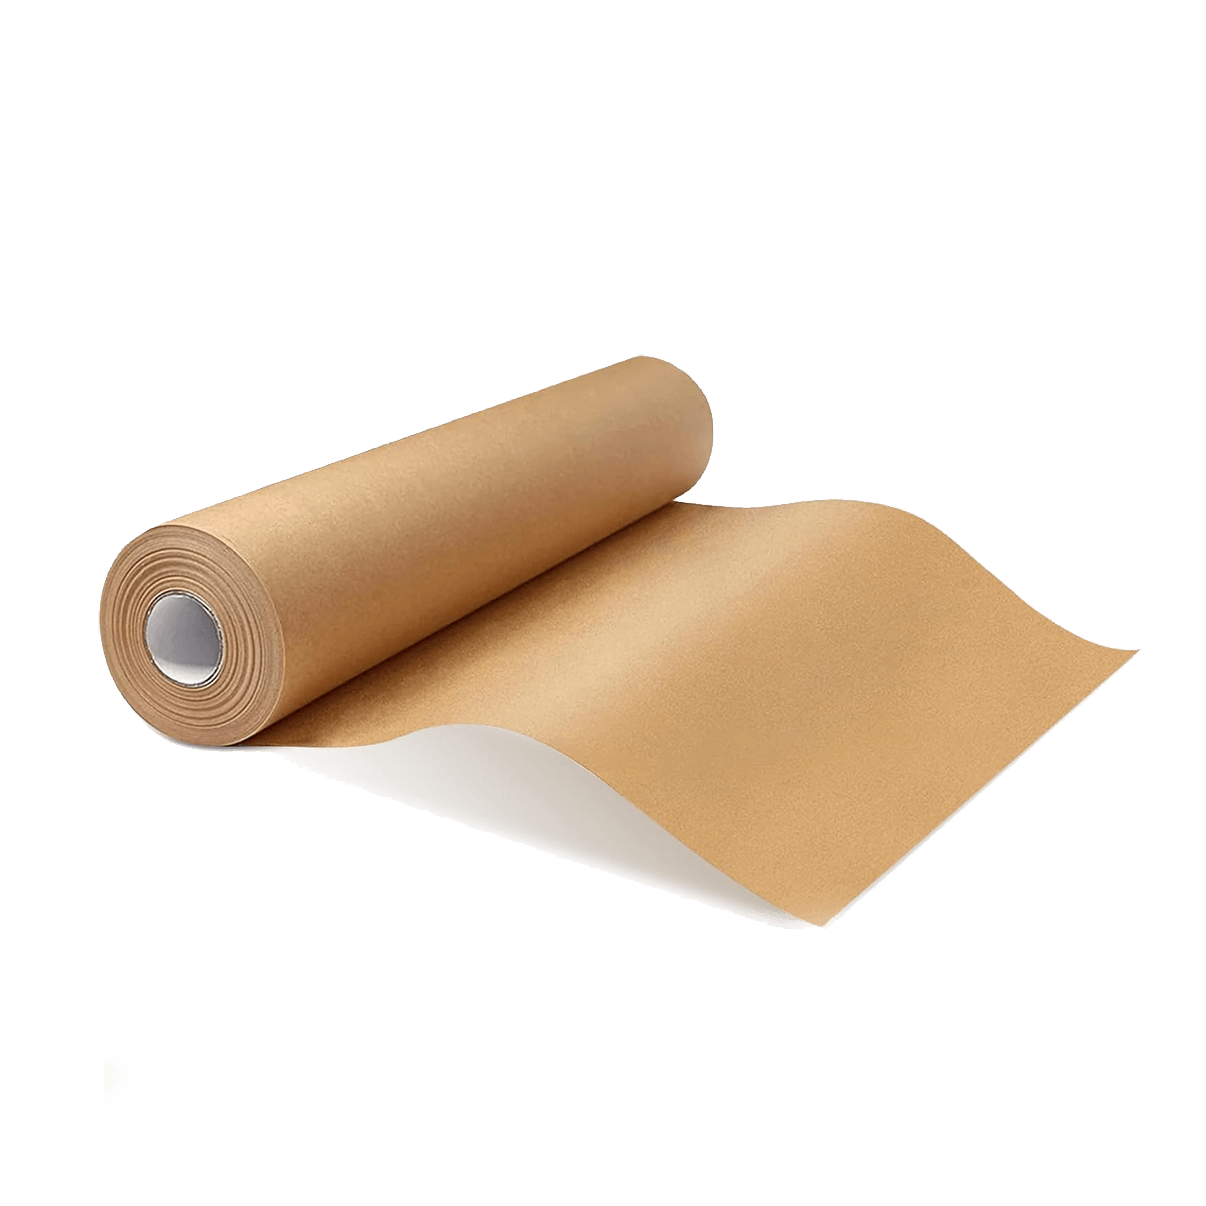
Baking Paper
You probably have this at home! This can be used as a working surface because the clay does not stick to it. Alternatively, you can secure a strip of baking paper around your mandrel with a piece of tape to build your rings on without them sticking.
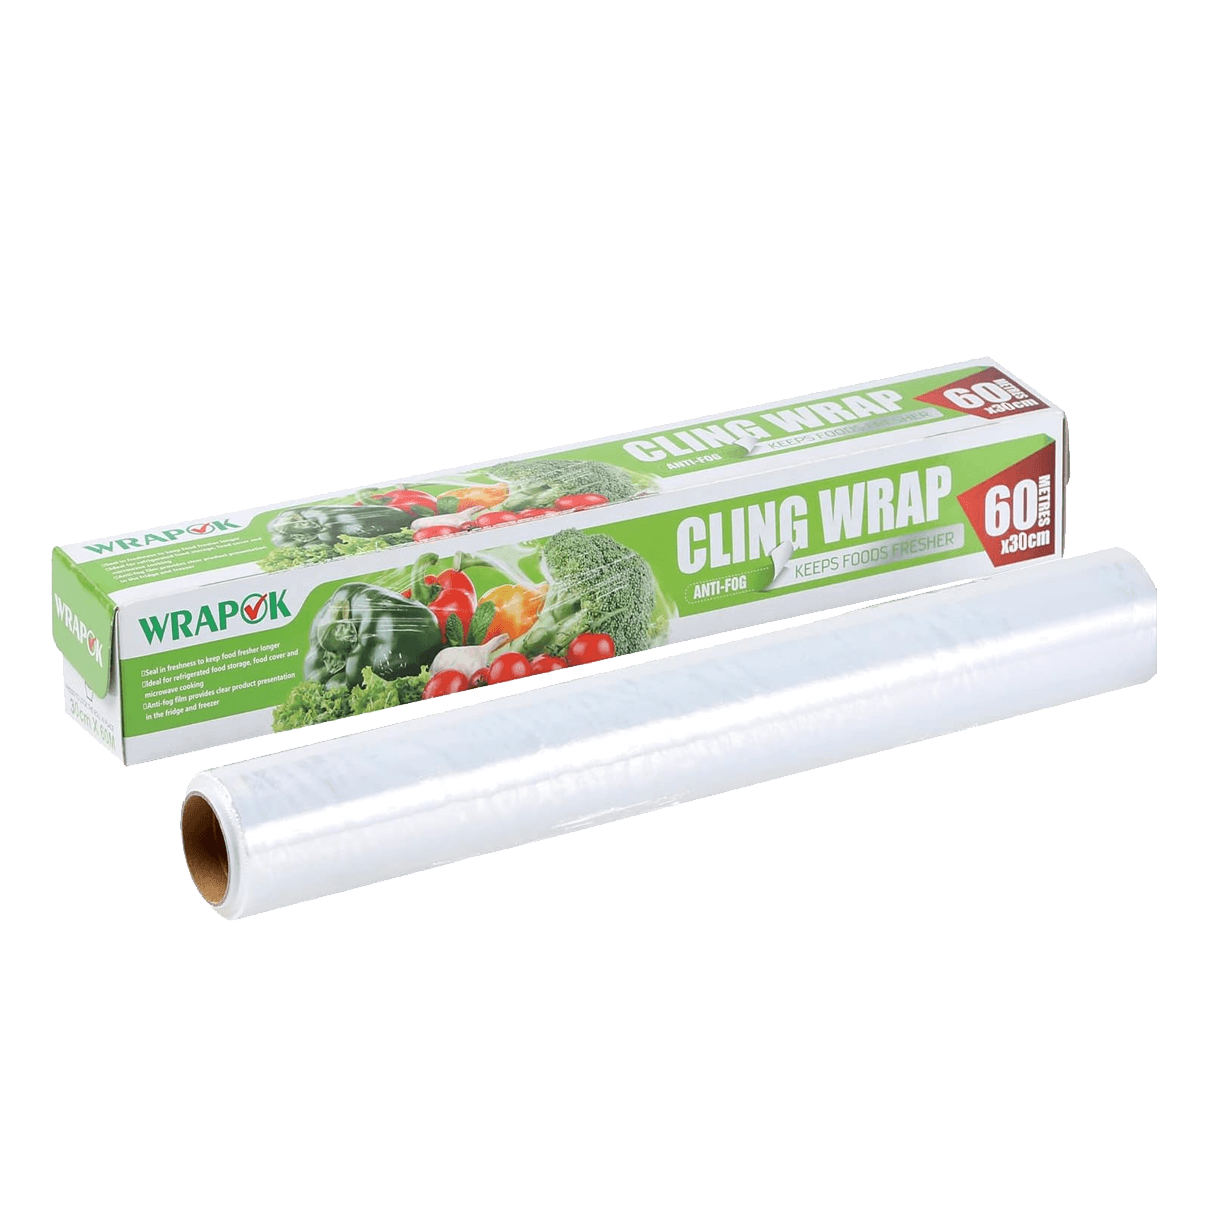
Cling Film
Grab it from your kitchen! This is to wrap the clay you are not using, otherwise it will dry out! If using a clay hydrator, wrap you clay loosely in a small piece of cling film and place it inside.
There is more useful stuff below, but this will already set you up for working with silver clay! Wanna learn how to use them all and make beautiful jewellery? Check the video courses and tutorials:
NICE EXTRAS
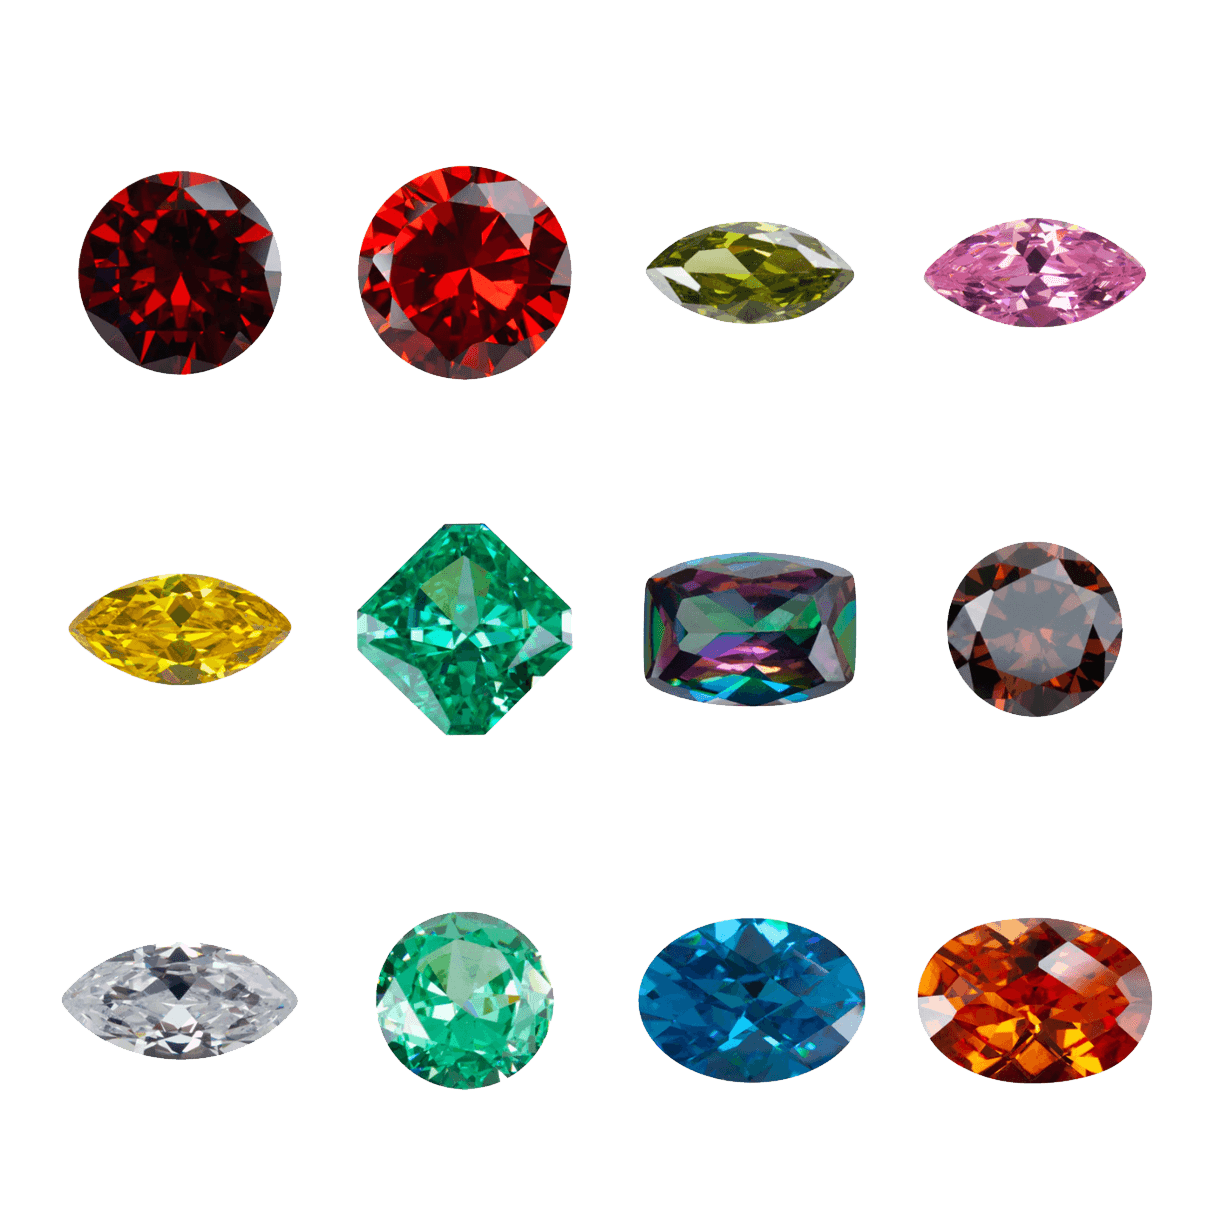
Gemstones
Cubic zirconia are excellent stones for silver clay. They come in different colours and shapes! These stones withstand the heat of firing, meaning you can set them directly into clay and fire together.
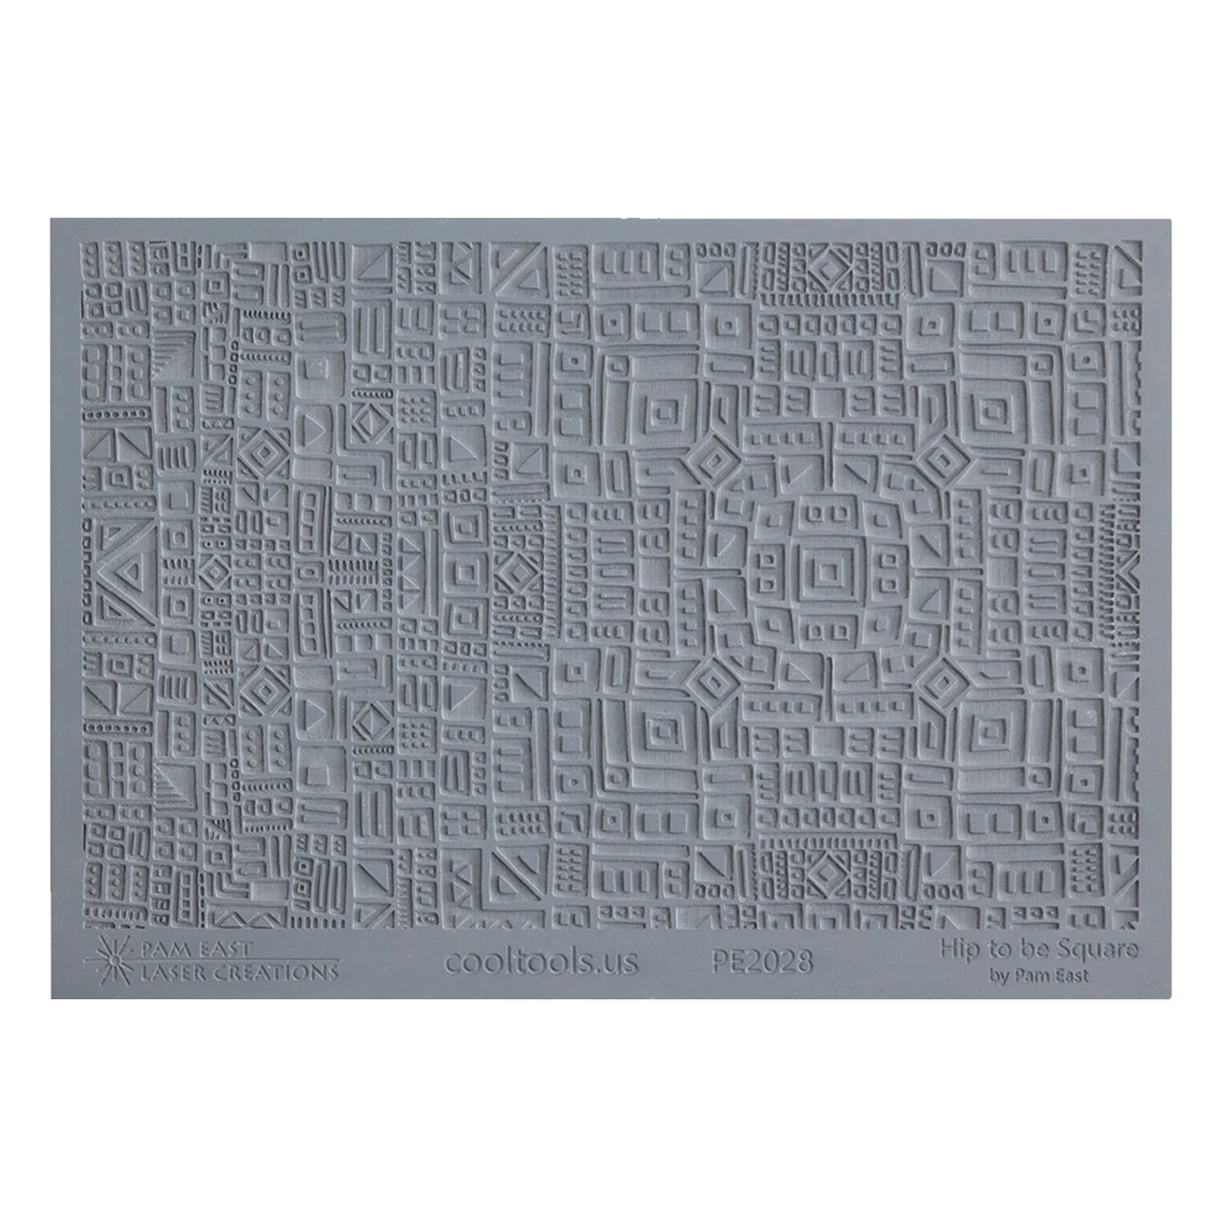
Texture Mats
These are an easy way to create beautiful textures with your silver clay. Put a bit of olive oil or CoolSlip on them to prevent sticking, press your silver clay into them, peel off carefully - that's it! Cut and finish as you please.
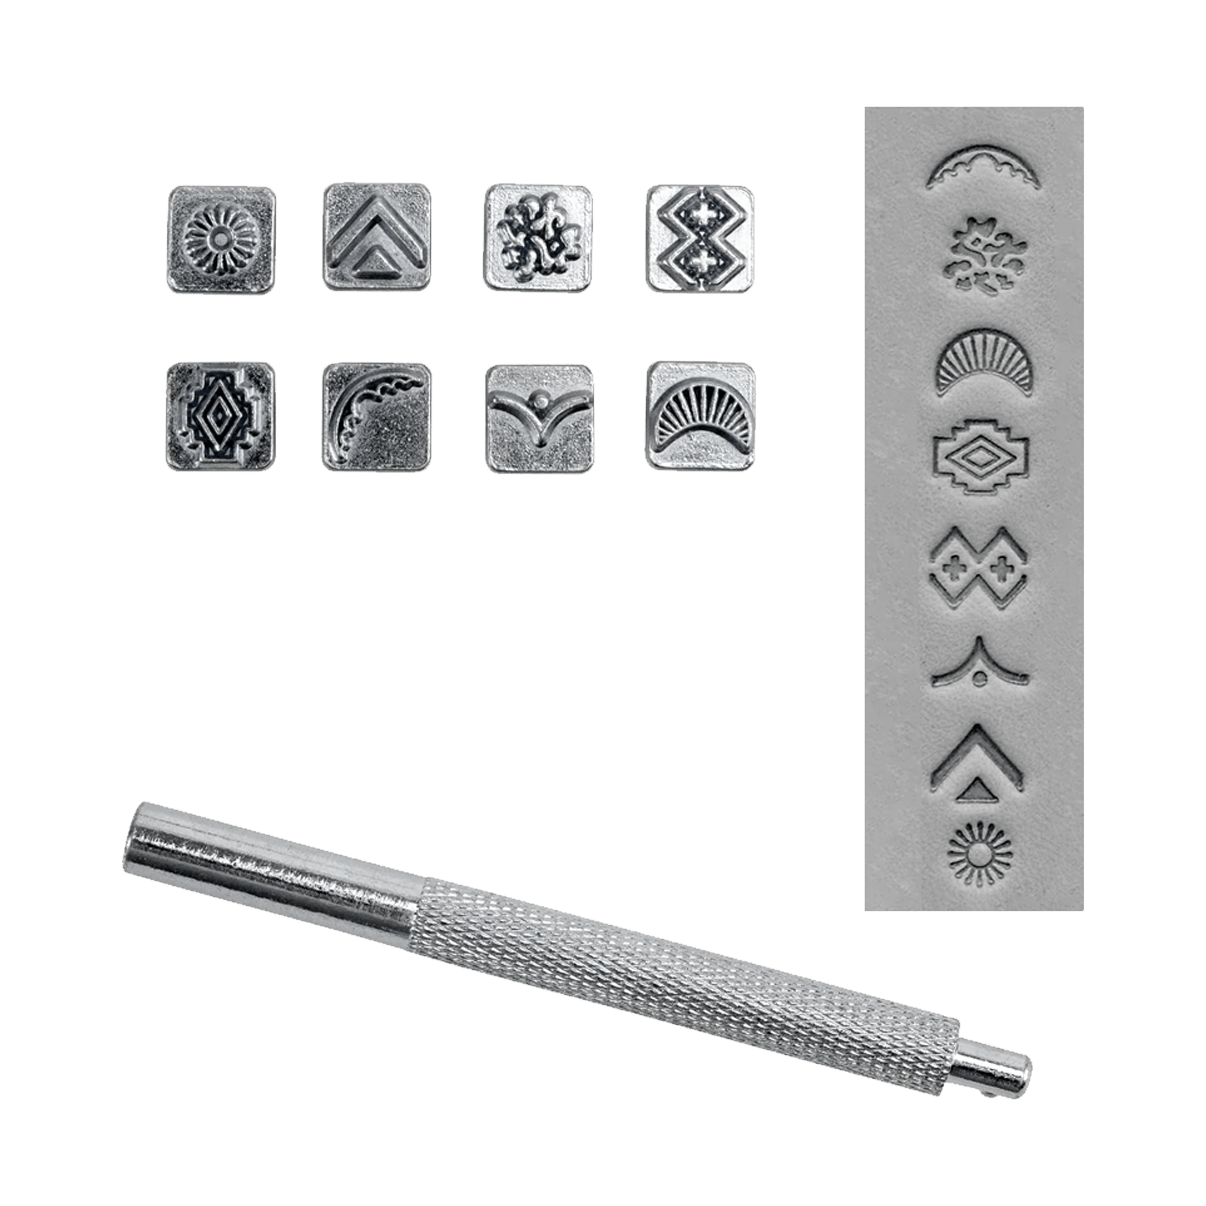
Stamps
A super easy way to add some design features to your silver clay creations. There are loads to choose from!


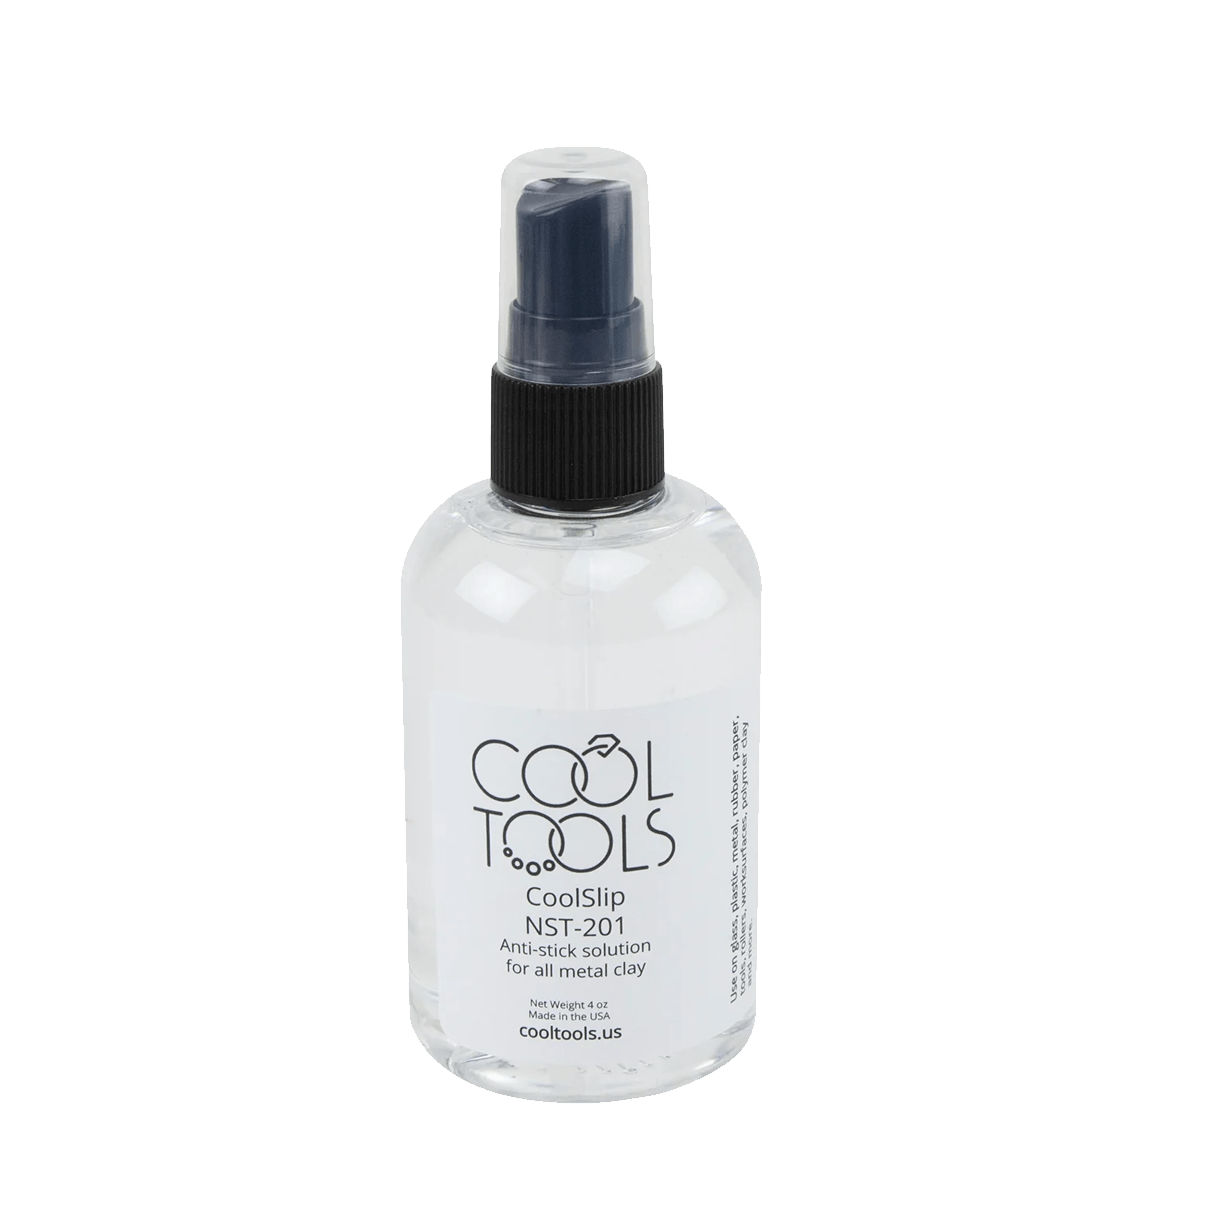
CoolSlip
Anti-stick solution that you can use for easy texture release or even spray it on your working surface, cutting tools, rolling pin or your hands to prevent sticking.
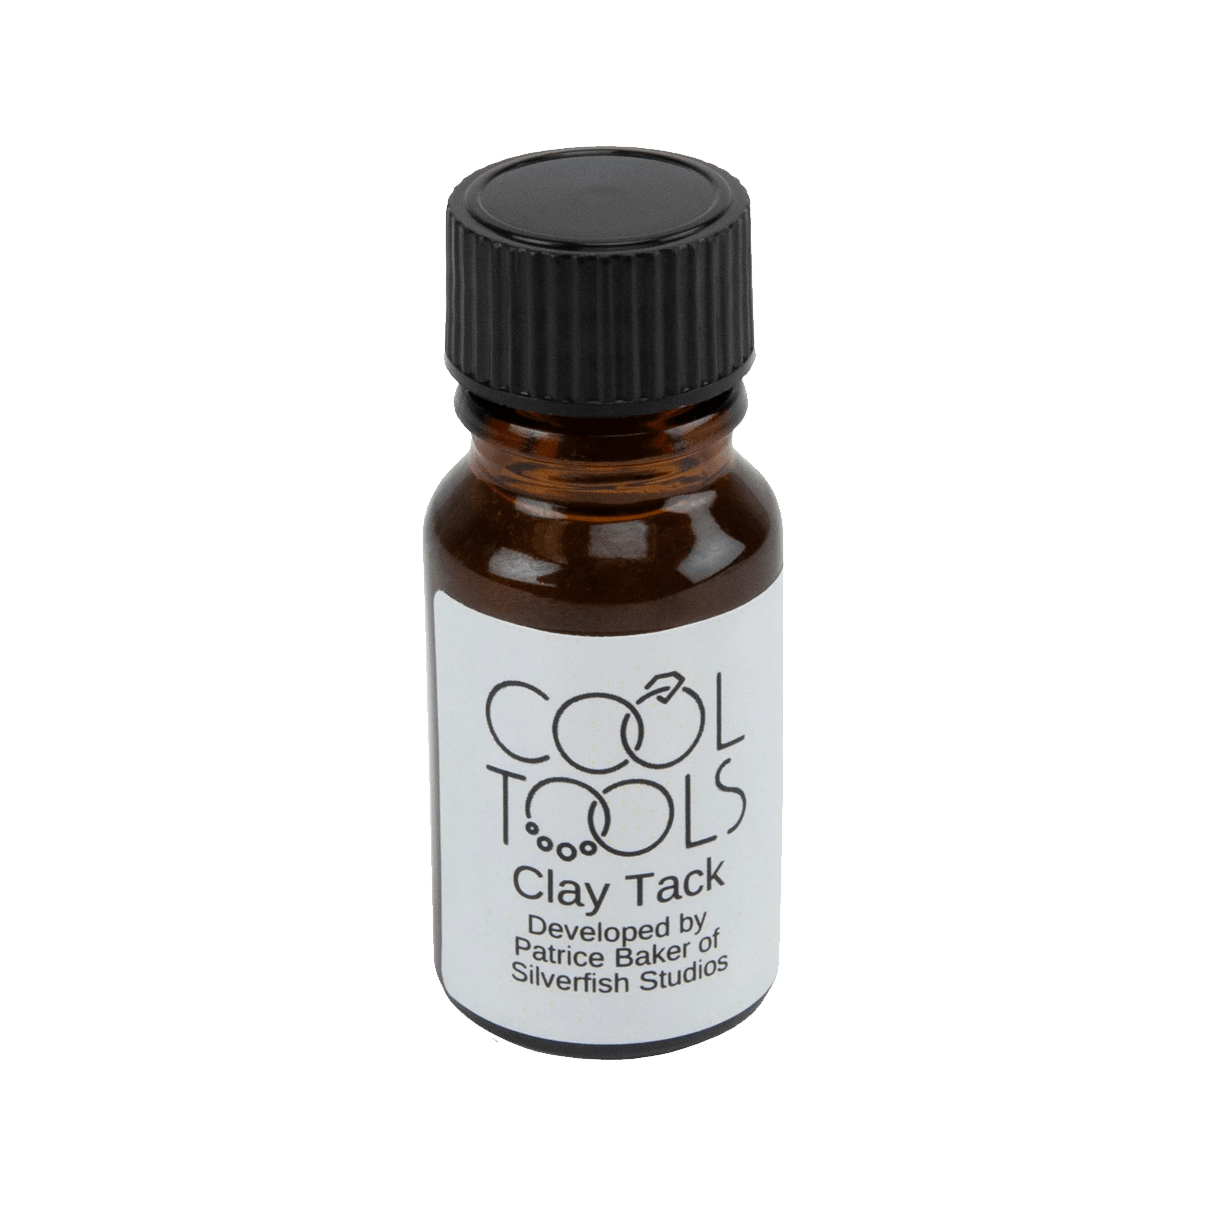
Clay Tack
It's like 'glue' for your silver clay. Use this special oil to attach parts easily and securely. Can be used wet-to-wet, dry-to-dry, or wet-to-dry. Otherwise, you can also use clay paste

Silver Clay Paste
You can make your own by adding water to normal silver clay, but you can also buy it pre-made. Use it for attaching parts, creating textures, fix cracks. Make sure it matches the brand and type of your regular silver clay
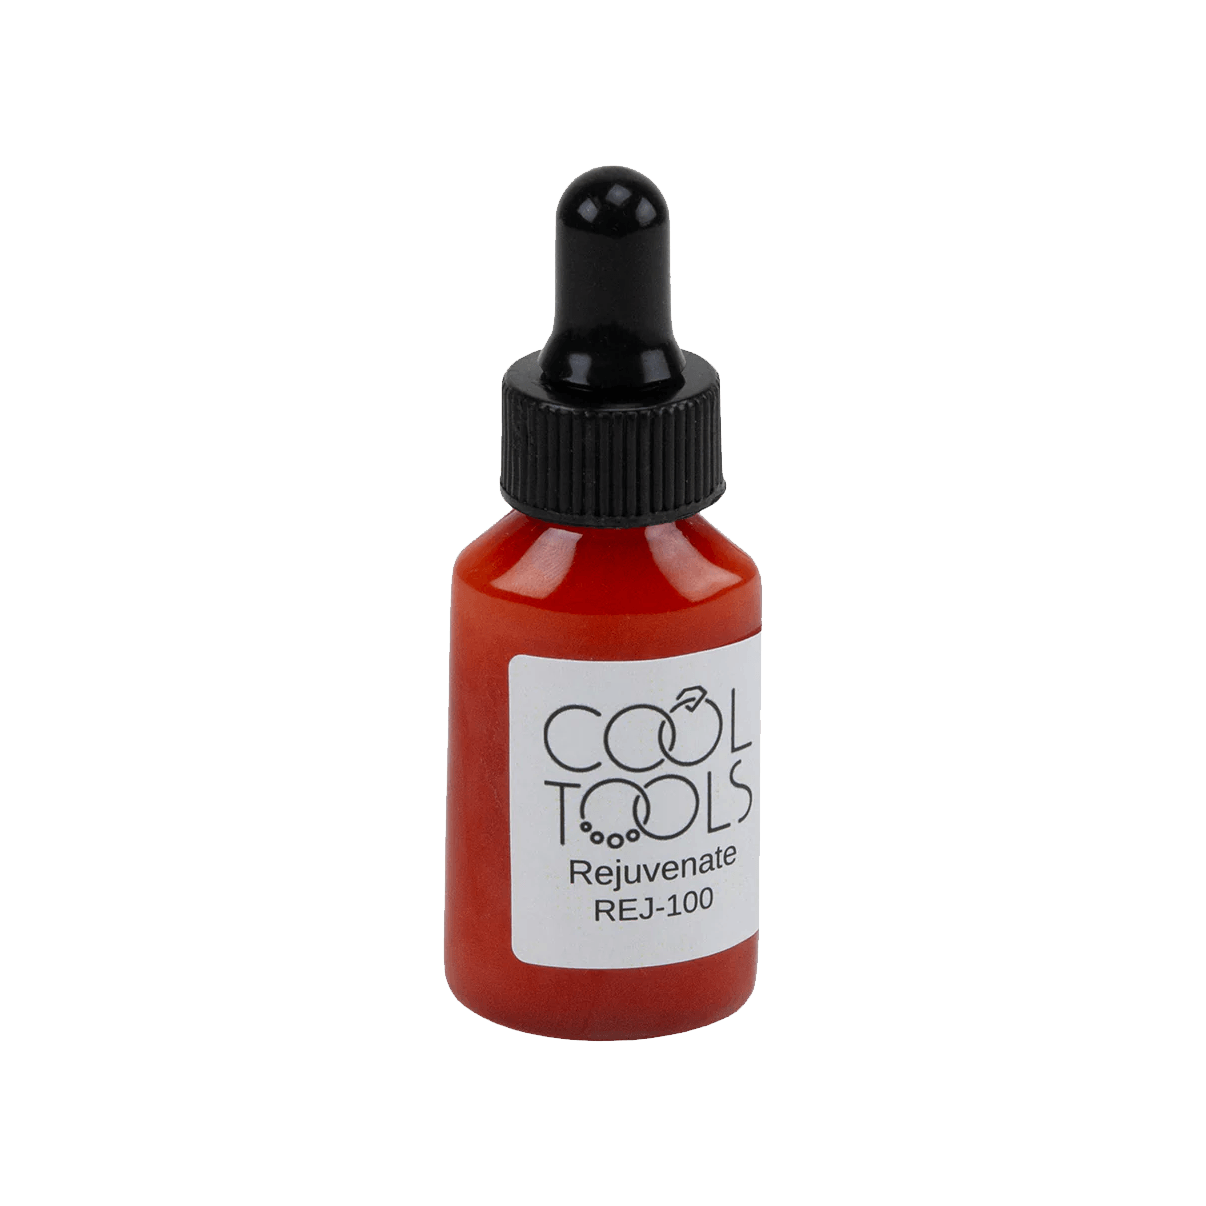
Clay Rejuvinator
This can restore your silver clay to optimal working consistency if dried a bit. Rejuvenate is also perfect for adding flexibility to metal clay and avoid cracks when shaping. Use this solution to create your own clay sheets or clay slip.

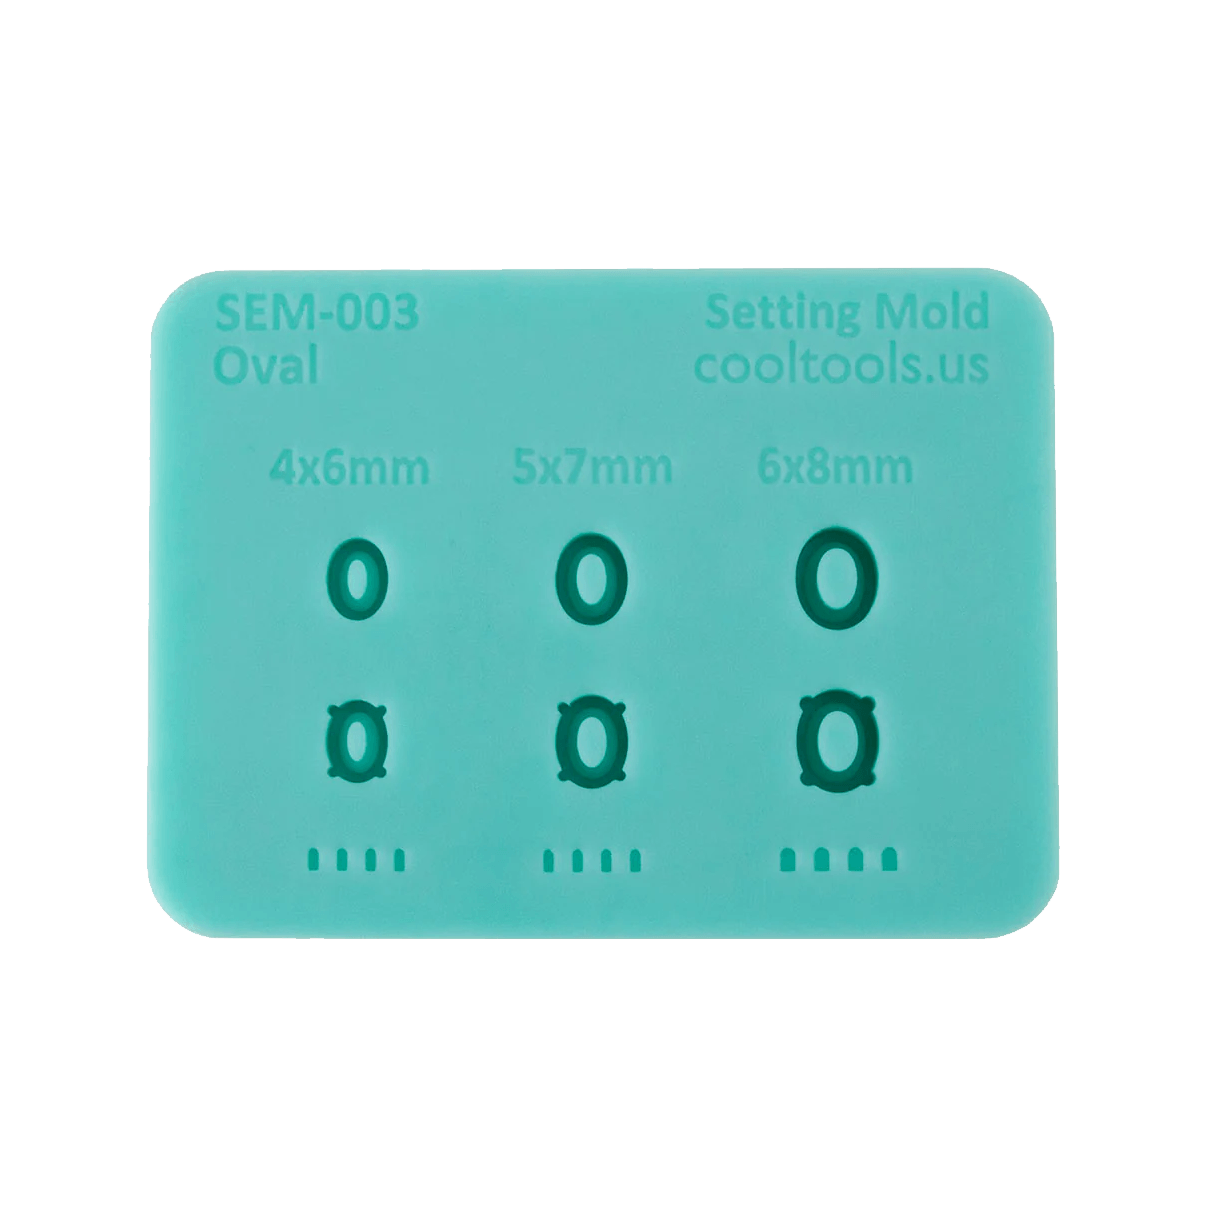
Gem Setting Mould
If you want less hustle when creating clay bezels for your fireable gems, there are molds for that! Press fresh clay into the mold, wait for it to dry, take it out and you have a ready bezel!
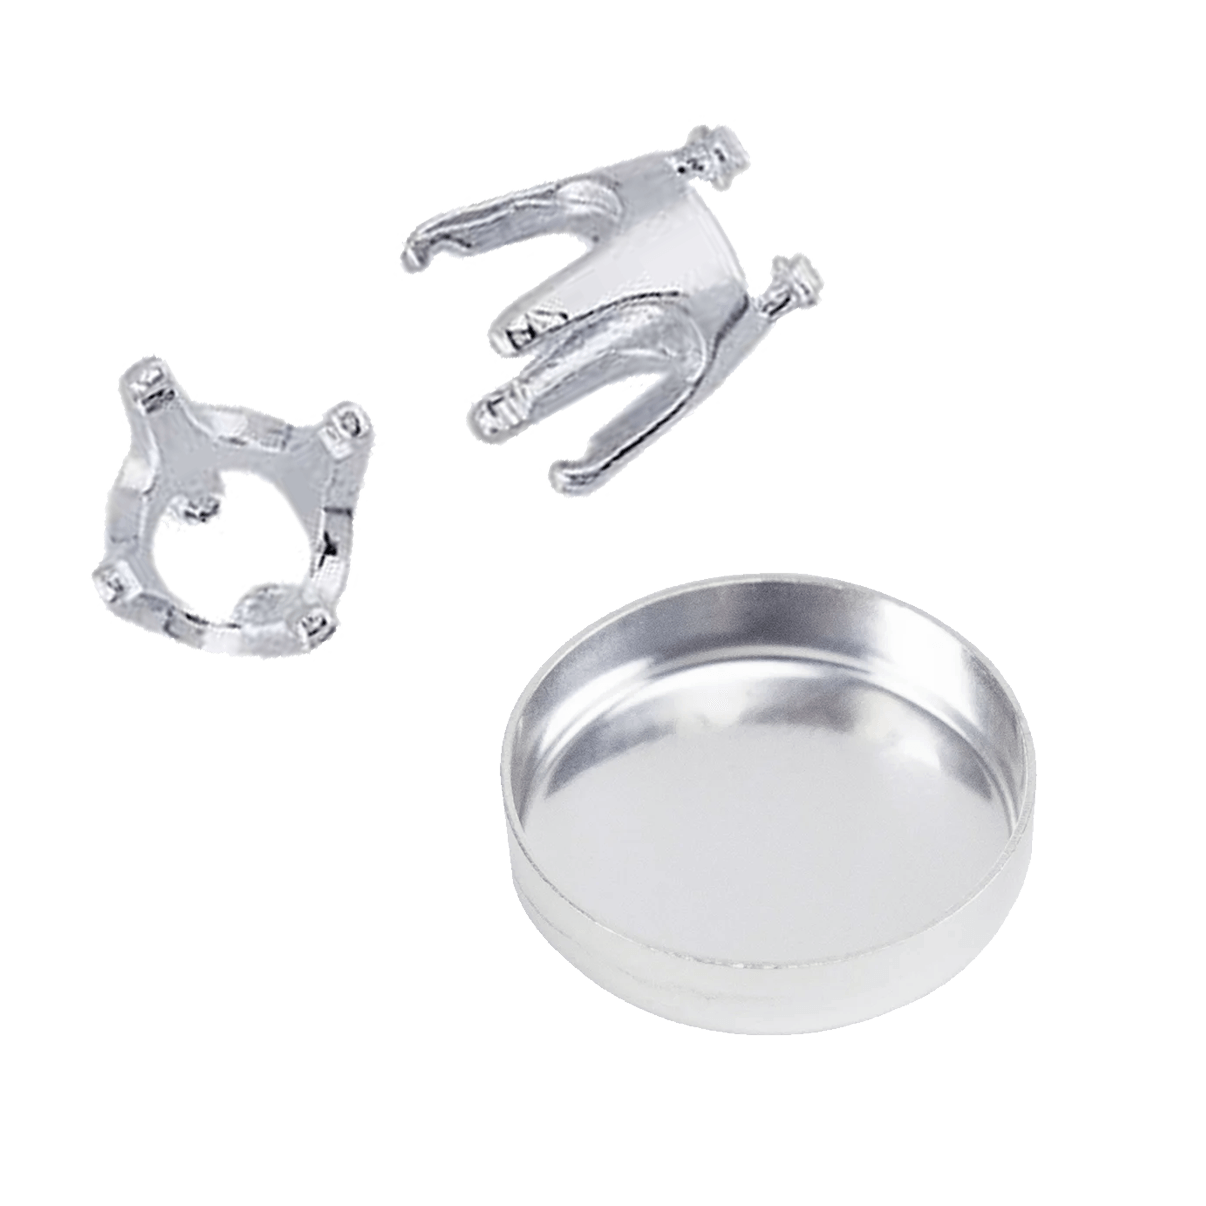
Embeddable Settings
Want to set gems that can't be fired? Check out embeddable settings. They are ready to use with your clay and allow you to set many gems without worrying about shrinkage or using adhesives. Choose fine silver ones if working with fine silver clay! If you want to learn how to use them, check the tutorials!

Kiln
Now if you are ready to invest later on, for selling your pieces or batch firing and ensuring perfect fire every single time - you may be ready for a kiln!
A kiln will also give you the ability to fire sterling silver clay, bronze and copper clays, and a wider variety of gems!
READY TO LEARN?

READY TO LEARN?
Check all silver clay tutorials here:
BEGINNER TOOL LIST
Everything you need to start
creating with silver clay
A complete guide
I put together this guide: to explain what each item does, share affordable alternatives, and point you toward where I got mine!
Some links are affiliate.
✨ Want it as a handy PDF cheatsheet as well? ✨
THE MUST HAVES
Silver Clay
The star of the show! If you are firing with a torch, make sure you select torch fireable clays (links below), these would be fine (999) silver clays. If you have a kiln, you can browse other silver clay types too, such as sterling or 950 silver clay! Different brands can have different shrinkage rates - choose the one that suits your needs!
Clay Hydrator
This is a game changer for storing silver clay! If not stored well, it can dry completely. This little thing will keep it in good shape for ages. Wet the sponges, squeeze excess out, wrap your clay in some cling film and pop it in. Shop or try to make your own!
Carving Knife
To cut your silver clay into shapes. A regular snap off blade will work too, but those craft knifes are great for precision!
Rolling Tools
You will need these to roll out your clay and to make 'clay snakes'. These are the bases of your designs.
Sculpting Tools
They will help you shape and sculpt your clay! They come in different shapes and sizes, having a set it helpful for every occasion
Couple of Brushes
A couple thin brushes will help you shape clay, lay clay paste to attach parts and brush water on it to prevent it drying too fast. Cheap ones will do!
Sanding Paper
Use this when your silver clay piece is dry, before firing. Helps remove scratches and imperfections, shape your design with ease and pre-polish before firing so final creation is super shiny!
Respirator or Mask
Don't get scared! This is why you need it: when sanding dry clay (e.g. to smooth it out), there will be some dust, and like any dust, you don't want to breathe it in! A respirator is comfy and reusable. But at the very least, pls use a dust mask, but a respirator is better and more convenient!
Torch
If using torch-fireable silver clay, you can use a torch to fire it. A regular butane torch from your local DIY or a hardware store will do the trick! Otherwise you can shop torch lighter below
Firing Surface
Get whatever is easiest for you to find – a soldering block, fibre brick, or firebrick (like the ones used in pizza ovens). Suitable materials are: ceramic fiber block, vermiculite fibre brick, or soldering block. Sometimes it will say what temperature they are rated to withstand, 1200C/2000F is a safe bet! You can fire the clay piece directly on them. Make sure what’s underneath and around is not flammable. DO YOUR RESEARCH depending on your space for the safest way to do this. TEST FIRST with your torch for a minute just to make sure all is good!
Polishing Tools
There are two ways to polish: polishing papers OR a rotary tool + radial disks. The rotary tool will get you a better polish and will be handy for drilling dry clay or even remodelling after firing when it becomes silver. Radial disks are great for polishing - they get into tiny details and do not need a polishing compound. You will need several grits - a coarse, medium, and fine. Use them in that order!
Ring Mandrel & Sizers
Only if you are planning to make rings! NOTE: clay shrinks by volume so make the ring 2 – 4 sizes bigger than desired (thin dainty designs will shrink less than chunky ones). Use a strip of baking/parchment paper secured with a small piece of tape. Wrap it around the desired size on the mandrel and place your clay on top of this base. This way you can take the ring off easily once it’s dry!
Playing Cards
Yep, those regular playing cards you have gathering dust in a drawer. Use them to control clay thickness when rolling it out. Just place equal stacks on either side of your clay and roll with a rolling pin. The cards will act as a stopper for your rolling pin, making sure the thickness is consistent and exact!
Baking Paper
You probably have this at home! This can be used as a working surface because the clay does not stick to it. Alternatively, you can secure a strip of baking paper around your mandrel with a piece of tape to build your rings on without them sticking.
Cling Film
Grab it from your kitchen! This is to wrap the clay you are not using, otherwise it will dry out! If using a clay hydrator, wrap you clay loosely in a small piece of cling film and place it inside.
There is more useful stuff below, but this will already set you up for working with silver clay! Wanna learn how to use them all and make beautiful jewellery? Check the video courses and tutorials that will teach you how! Detailed, no boring theory, just pretty jewellery projects for you to follow and learn as you make. Watch anytime, anywhere, in your own time.
THE 'NICE TO HAVE'
Gemstones
Cubic zirconia are excellent stones for silver clay. They come in different colours and shapes! These stones withstand the heat of firing, meaning you can set them directly into clay and fire together.
Texture Mats
These are an easy way to create beautiful textures with your silver clay. Put a bit of olive oil or CoolSlip on them to prevent sticking, press your silver clay into them, peel off carefully - that's it! Cut and finish as you please.
Stamps
A super easy way to add some design features to your silver clay creations. There are loads to choose from!
CoolSlip
Anti-stick solution that you can use for easy texture release or even spray it on your working surface, cutting tools, rolling pin or your hands to prevent sticking.
Clay Tack
It's like 'glue' for your silver clay. Use this special oil to attach parts easily and securely. Can be used wet-to-wet, dry-to-dry, or wet-to-dry. Otherwise, you can also use clay paste
Silver Clay Paste
You can make your own by adding water to normal silver clay, but you can also buy it pre-made. Use it for attaching parts, creating textures, fix cracks. Make sure it matches the brand and type of your regular silver clay
Clay Rejuvinator
This can restore your silver clay to optimal working consistency if dried a bit. Rejuvenate is also perfect for adding flexibility to metal clay and avoid cracks when shaping. Use this solution to create your own clay sheets or clay slip.
Gem Setting Mould
If you want less hustle when creating clay bezels for your fireable gems, there are molds for that! Press fresh clay into the mold, wait for it to dry, take it out and you have a ready bezel!
Embeddable Settings
Want to set gems that can't be fired? Check out embeddable settings. They are ready to use with your clay and allow you to set many gems without worrying about shrinkage or using adhesives. Choose fine silver ones if working with fine silver clay! If you want to learn how to use them, check the tutorials!
Kiln
Now if you are ready to invest later on, for selling your pieces or batch firing and ensuring perfect fire every single time - you may be ready for a kiln!
A kiln will also give you the ability to fire sterling silver clay, bronze and copper clays, and a wider variety of gems!
READY TO LEARN?
Check all silver clay tutorials here:
READY TO LEARN? CHECK SILVER CLAY TUTORIALS BELOW