EASY FLUSH SETTING FOR NON-FIREABLE CABOCHONS
Learn my secret to adding natural stones to clay. Set any natural stone in your silver clay creations the easy way! You may already know that the vast majority of stones cannot be fired together with silver clay. That does not mean you can't use those beautiful stones in your handmade jewellery!
But how? The clay will shrink when fired.. You don't have a solder set up.. what can you do?
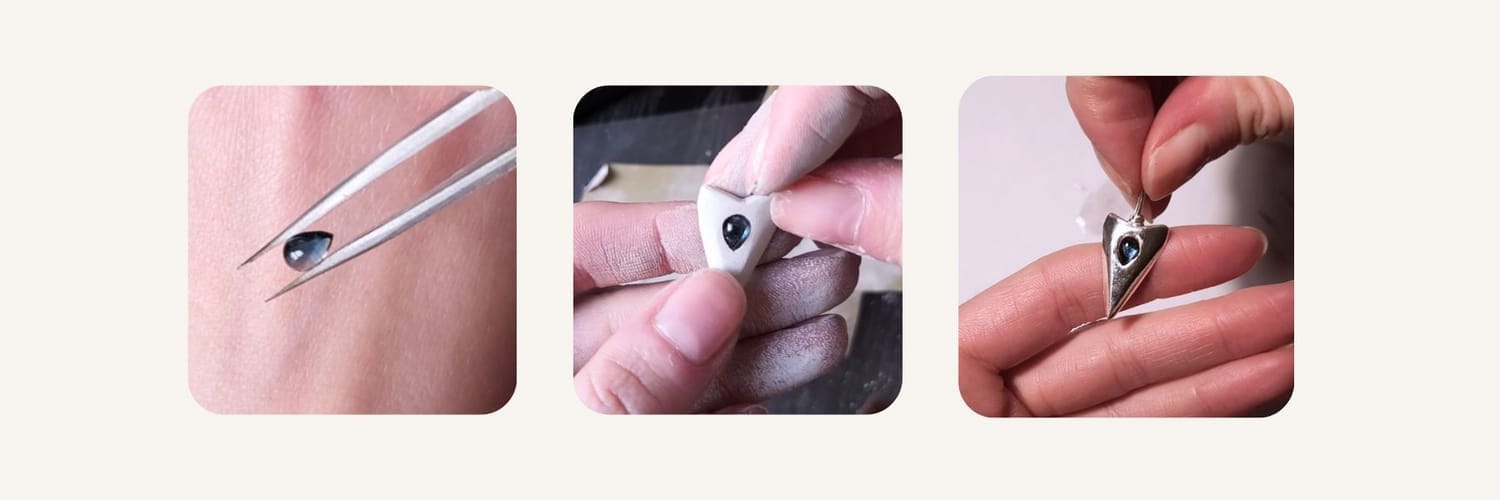
You have to set them after firing. This tutorial will show you the easiest way to set those stones, no extra skills or silversmithing needed. This tutorial works best with gemstones that have a flat back.
Round shapes are easiest, but with a bit more effort you can set various shapes of this type of stones!
IN THIS TUTORIAL, YOU WILL...
Free your creativity to set natural stones in your silver clay
Learn how to make a setting without soldering or silversmithing
Find out tricks & formulas for sizing the setting to account for shrinkage - shrinkage calculator supplied!
Troubleshoot in case the stone still didn't quite fit
Learn about a strong way to adhere the gem
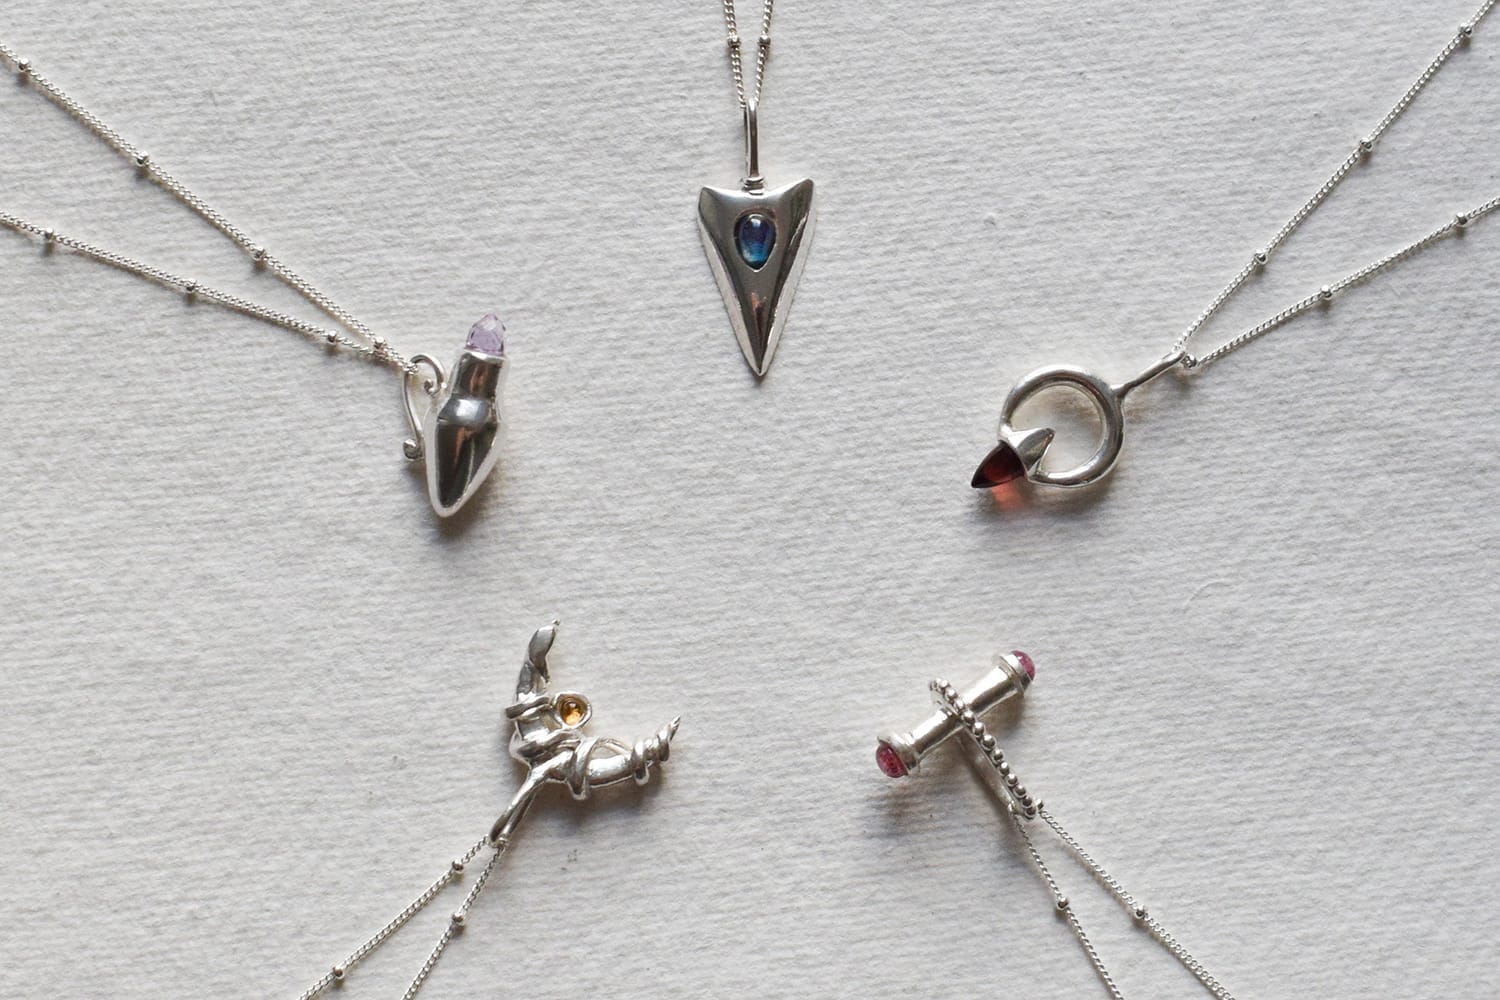
Create this setting for any jewellery type (pendant, ring, earring)
Discover where you can purchase gems
Get a list of everything you need with suppliers linked
This tutorial is about setting the stones ONLY. It assumes basic understanding of silver clay (beginner-friendly!) and doesn't contain a start-to-finish jewellery piece guide.
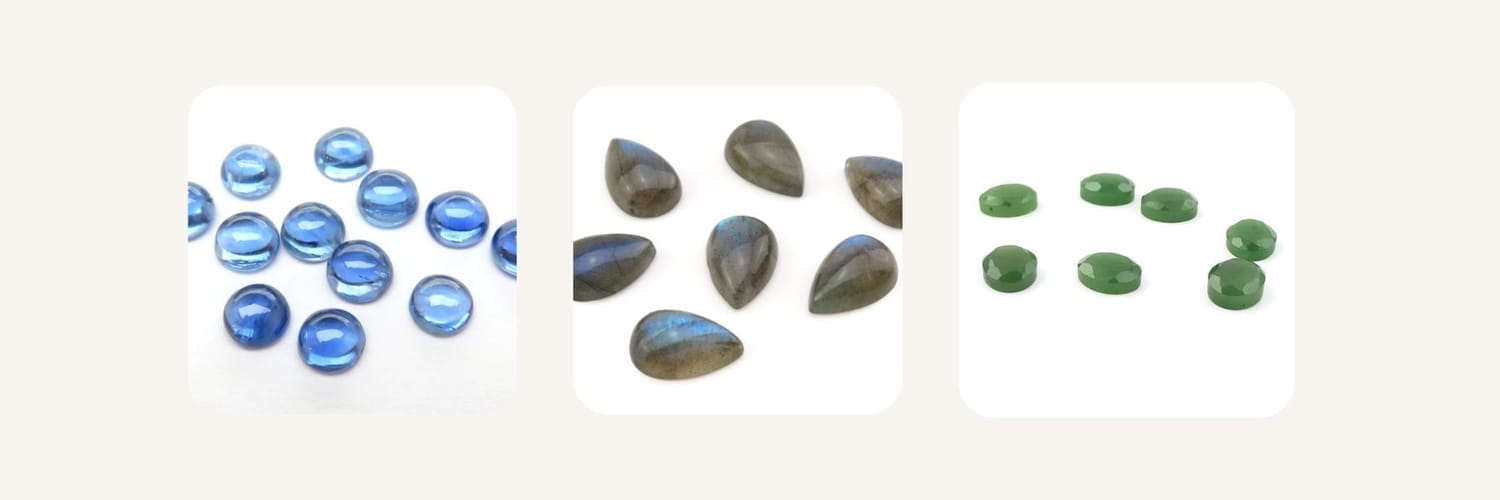
WHAT STONES CAN I SET?
Any heat sensitive natural/synthetic stone
Stones with a flat backing (without a pointy pavilion!)
Various shapes and cuts, such as rose cut, with a flat back
Any type of cabochon
Not suitable for diamond cut stones
Not suitable for stones with any cut that does NOT have a flat back
WHO IS THIS TUTORIAL FOR?
✨You’ve already dipped your toes into silver clay and know the basics and now you’re ready to level up
💎 You’ve been dreaming of adding beautiful stones or cabochons to your designs especially ones that can’t be torch or kiln fired
🎨 You love creating meaningful, unique pieces
🚀 You want to confidently set stones in silver clay without feeling overwhelmed by new techniques, buying new tools, or learning how to solder
WHAT WILL I NEED?
Apart from the usual silver clay basics, this type of setting will need a rotary tool. There are inexpensive options in case you haven't got one yet (there will be one linked in the tutorial)!
A rotary tool is a game changer when it comes to silver clay - it makes shaping and polishing so much easier and faster! So I highly recommend you get one, even if you are not planning to set stones :)
Love learning alongside other creatives?
You can purchase this tutorial as a standalone lesson with permanent access for $17
Or, if you prefer learning inside a creative community with ongoing tutorials and feedback, you can join the Silver Clay Membership, where this tutorial is already available for all members at no extra cost! We have over 80 people inside!
Membership includes monthly new projects, support, and access to all included courses while your membership is active.
Choose the path that fits your creative journey!
MORE TUTORIALS